Sunday, May 3, 2020

Dreams of Versailles and a DIY Planter

Hello, friends!  I hope this post finds you in good spirits and in good health, especially during these uncertain and difficult times.  This pandemic has been surreal, and it has been such a quandary trying to bode well and navigate these circumstances by attempting to be wise, cautious, and proactive!

I'm sure in childhood, most have heard the proverb 'April Showers bring May flowers.'  A couple of weeks ago (see post here), I shared the happenings around my garden.  When videoing the area, I included a shot of my Versailles-style deck planter box.

I have always been a fan of the well-manicured, overtly curated garden.  One of the most famous and meticulous in the world is featured at the Palace of Versailles.  There are paths, orangeries, statuaries, parterre gardens, and more.  It is definitely on my bucket list to one day tour the fantastic grounds.

Isn't this stunning!!?


The garden is not only famous for its expansive, beautiful grounds; it is also famous for its distinctive planters, shown here in the orangery.  These planters were originally designed during the 17th century by André Le Notre, the gardener of King Louis XIV.


A couple of years ago, when I was planning some of the landscape aspects of my backyard, I thought it would be a great idea to incorporate some of the elements seen in Versailles.  I decided I wanted to add a deck-sized Versailles-style planter and fill it with a combination of topiary and white roses.

Upon searching for a planter, I must say I was shocked at how expensive a Versailles-style planter is!!  There are varying types, and even the same ones officially used in the palace, all at different cost levels.

If you want an official planter like those seen in Versailles, you must fill out a form before you will even be quoted a price!!  Serious gardeners, only please.  Ha.  These are manufactured by Jardins du Roi Soleil, and they are the official provider of the boxes seen at the palace.


A close second (a cheater brand to be honest), is the planter from Jardinier du Roi (note the closeness of the website name...however, these ARE NOT the official ones seen in Versailles).  One of my favorites of theirs is the Ladurée vert.  These are inspired by the famous Ladurée Pâtisserie in Paris.  These will cost you a bit over two thousand dollars to start and upwards to four thousand or more, contingent upon size.


I found a site offering an insight into how much the official planters cost, which start at $3,100 and up to over 10k!!  These were found at Eye of the Day.


One of my favorite sites to peruse is Accents of France, makers of fine French trelliage and planters.  They make truly beautiful planters such as these.


The site also offers a latticed variation, which I rather love.


However, just as those offered at the aforementioned official Jardins du Roi Soliel, you must fill out a form before a price will be quoted to you.

There is such a plethora to choose from!!  Even Frontgate offers a cost-efficient version, with a starting price of $600.


Being the frugal gal that I am, I figured I could build one myself at a fraction of the cost.  I am by no means a professional, but I love a challenge and usually take them head-on!!

If you would like to see a shortened video version of the step-by-step, you may do so here:


The written instructions:

To build your Versailles-inspired planter, you will need:

One fence section (I had a dog-eared one leftover from the prior building of my backyard fence)
Four 4X4 fence posts with attached finials (Cedar French Gothic Fence Post came from Home Depot)
Saw
L brackets
Decorative bracket hardware
Nail gun and Nails
Staple gun and staples
Wood planer
Two 1" X 3" X (? desired length of planter) wood boards
3/4" X 9" Wood planks
Metal Struts
Paint
Deck screws
Large 4X4 beam
Large plywood or thin particle board sheet
Level
Drill and assorted drill bits
Mold-resistant landscape fabric


I began by removing the dog-eared and uneven sections of my fence panel.


Next, I cut the fence into two even sections.


I used a planer to even out any flaws or uneven bits.


Using my fence posts as a guide,


I measured and cut a few board planks to be the sides of the planter.


Measure and cut the 1X3 boards to length of the two fence panels portions.  These will follow the length of the planter. Please excuse my sawdust!! LOL


Using a nail gun, attach the 1X3 boards to the outer sides of the fence sections.  This will act as an additional strut, as well as offering aesthetic appeal to the outside of the planter.


Paint all the parts of the planter.


Next, I added decorative brackets as an additional interesting feature.


Cut the 4X4 beams to the desired width of your planter.

I used brackets (in the corners) and struts (on the outsides) to attach the fence posts to the 4X4 sections.  I used heavy-duty screws and deck screws.


Repeat until all of the elements are put together.


Next, I added the pre-cut and pre-painted wood planks to the sides of the posts using L-brackets.


Measure the bottom of your planter, and cut the plywood sheet to fit.


Use a spade drill bit to create irrigation holes in sporadic places throughout the bottom of your planter. Place inside the planter box.


Finally, cover the insides of the completed box with mold-resistant landscape fabric, and use a staple gun to hold in place.  I doubled mine up.  This will help to prevent roots or anything growing out of the sides of the planter.


Please keep in mind, I added a bottom so that the box could be moved if so desired.  If you dig out an area prior to your build, it may not be necessary to add the bottom.

Just add nutritious planting soil and flowers!!!

I made a cutesy video of my adding the flowers.  You can view it via my YouTube channel here:


Voilà!!


When it was all said and done, I believe I spent less than $100 on the project, most likely because I did not have to purchase the panel.  I estimate it certainly will cost less than $150 if you are building one for yourself.  I hope you enjoyed this little look into my garden!!


Please be safe wherever you might roam.  Until next we meet,


--Y


If you enjoy this post, please visit the archives!  You may also visit my full profile to view my other blogs. Connect with me on my Facebook Page, Parsimonious Décor Darling.   You might like to visit my other blog hubs,  

The Marvelous Maison, a lifestyle blog hub and 
Frugal Fab Fashionista, my fashion blog hub. 

Follow me on Pinterest!!  Please be sure to kindly follow the board guidelines, as it takes time and effort to find fabulous pins across the Internet and Pinterest!  Thank you!  

Thank you for stopping by! ❤


Sunday, April 19, 2020

Video-Springtime in the Garden

Good morning, friends.  I hope this post finds you and your loved ones safe and well during these uncertain and chaotic times.  It has been surreal, to be certain.  Today, I am posting a video of my garden. You’ll have to forgive the sporadic tremors in the footage, I am still trying to master it!  😊  It’s been such a long time since I’ve posted I’m afraid...my children are growing and slowly leaving the nest, with the next one due to graduate this year (quite unfortunate in these circumstances), one finishing sophomore year, one finishing middle, and the littlest one with only one year left in primary.  It has been a blur!

I hope you enjoy.  Please take care and continue the practice of proactivity!


Video playlist:

1.  Seven Sisters by Tori Amos

2.  Bach Cello Suite #1 Prélude interpreted by Mischa Maisky

3.  Excerpt:  Tout Petit Moineau (Every Little Sparrow) by Igorrr featuring Laure Le Prunenec

4.  Epona by Enya

5.  Excerpt:  Flower Duet from Lakmé by Léo Delibes featuring Sabine Devieilhe and Marianne
     Crebassa

6.  Excerpt:  Aniron by Enya


If you enjoy this post, please visit the archives!  You may also visit my full profile to view my other blogs. Connect with me on my Facebook Page, Parsimonious Décor Darling.   You might like to visit my other blog hubs,  

The Marvelous Maison, a lifestyle blog hub and 
Frugal Fab Fashionista, my fashion blog hub. 

Follow me on Pinterest!!  Please be sure to kindly follow the board guidelines, as it takes time and effort to find fabulous pins across the Internet and Pinterest!  Thank you!  

Thank you for stopping by! ❤


Saturday, April 13, 2019

Fields of Joy

Let's wander slowly through the fields
Slowly, slowly through the fields....
I touch the leaves that touch the sky
Just you and I...
through fields of joy.


All trouble slowly fades away
Slowly, slowly fades away...
I hold your hand inside my hand...
Across the land...
through fields of joy


The sound of music that we hear
The blend of colors in the air
All cities, mountains disappear from view
All truth and beauty near to me and you...


With you through the fields...
The fields of joy.


Let's wander slowly through the fields
Slowly, slowly through the fields!!
I know our love will never die
Just you and I
Through fields of joy!


Lyrics:  H. Kamen, S. Fredricks; covered by L. Kravitz


I hope you are enjoying the beautiful springtime.  We have had a wonderful abundance of growth and a plethora of different species blooming.  The recent heavy rains combined with the cool (but not too cool) to warm (but not too hot) weather and a culmination of other factors have brought us the phenomena which is adeptly termed the SuperBloom in several areas here in California.  It is truly a sight to see, and in the several years I have lived in this area, I have never seen such beauty. 


I hope you all are enjoying the beautiful bounty of Spring!!


Until next we meet,

-Y


If you enjoy this post, please visit the archives!  You may also visit my full profile to view my other blogs. Connect with me on my Facebook Page, Parsimonious Décor Darling.   You might like to visit my other blog hubs,

The Marvelous Maison, a lifestyle blog hub and 
Frugal Fab Fashionista, my fashion blog hub. 

Follow me on Pinterest!!  Please be sure to kindly follow the board guidelines!  Thank you!  

Thank you for stopping by! ❤


Thursday, March 14, 2019

Set Your Table With Flair--Just Add Green


Hello, all!  Hasn't the weather been curious?  We have had rain by the bucketful followed by very crisp winter-like days, and just this week, an abundance of sunshine.  Oh, California weather, you are stanchly unchanging in that you are always changing.  Constantly.  I am glad though, that the drought has finally gone! 


Saint Patrick's Day is this weekend, and it may be cliché, but the best way to decorate for this fun day is to just add green!  This setting is super simple, unfussy, and festive.  A charming celadon topper adorned with pretty china and uncomplicated flowers seemed like a great way to keep things low-key this year.


A recent find are these beautiful white and green antique dishes.  This gorgeous china is elegant, yet when paired with a fun cabbage saucer and a cupcake prepared in a silicone "terra cotta" pot, the setting becomes much less frou-frou, more lighthearted, and definitely indicative of the forthcoming springtime, which I await eagerly each year.


How easy is this!?  I used a heart-shaped mold to make candy melt shamrocks and adorned each little cupcake "pot" with a festive green ribbon.  A sprinkle of green and white sugar completed the potted cakes.


This cake, which is served on the matching platter, is delightful chocolate decorated with white frosting, green and white sugar granules, and a hand-drawn candy melt shamrock.  Easy!


I added a few cute napkins for dainty dabs...aren't they fun!?


The completed tablescape:


I hope the weather is fair where you dwell...until next we meet, Happy Saint Patrick's Day!


From my collection:


Celadon damask topper, Lauren Ralph Lauren, HomeGoods
Antique Green and White China, Walbrzych Poland, Local Antique Shoppe
Teapot, Godinger
Cabbage saucers, Maxcera, HomeGoods
Terracotta Pots, Wilton
Napkins, TJ Maxx/HomeGoods


If you enjoy this post, please visit the archives!  You may also visit my full profile to view my other blogs. Connect with me on my Facebook Page, Parsimonious Décor Darling.   You might like to visit my other blog hubs,  


The Marvelous Maison, a lifestyle blog hub and 
Frugal Fab Fashionista, my fashion blog hub. 

Follow me on Pinterest!!  Please be sure to kindly follow the board guidelines, as it takes time and effort to find fabulous pins across the Internet and Pinterest!  Thank you!  

Thank you for stopping by! ❤


Sunday, October 8, 2017

Set Your Table With Flair--A Shockingly Manic Panic Halloween

Welcome, spooks and specters!!  Thank you for visiting my blog!  Halloween is one of my favorite holidays, bar none, right behind Christmas!  I absolutely love it!

If you have been here before, you are aware that I am a Music Manic Fanatic.  I also am a firm believer that music unites and brings people together.  I have always been a person who appreciates people of all different kinds and from all walks of life with music being a strong contributing factor of how I connect with those people.  Whether or not if I were discussing composers with band friends, or dancing the night away to Cumbia, Rock en Espanol, Meringue, Reggae-Ton, or even BANDA! in my twenties with gal-pals, or taking in a show of a local rock, punk, goth, or ska band, I have always enjoyed it! This was especially true in my youth; I was much less serious and much more carefree.  I was heavy into the music scene, and I especially loved (and still love) alternative rock. 


When I was younger, being an alt-rock goddess meant sometimes you might dye your hair different colors if you wanted to make a bold statement.  One color I had always admired then but never had the guts to try was Manic Panic's Shocking Blue.  If you are a rocker or even a savvy stylist, you know that Manic Panic is the authority on awesomely alternative hair color. 


Here is a peek.  Sooo gorgeous!!!  This one is a classic.  You can order it via their site here.


Here I am trying out a platinum look years ago.


As far as color goes, I only went as far as a purpley-burgundy, because I was a little too chicken quite frankly to push the limit (and test my mother's patience) more than I already had, lol.  So glad I've outgrown those days...but I've never outgrown the whimsical idealism of youth, especially during the holidays.

My favorite type of Halloween décor usually includes some sort of gothic or Victorian element, and when I was perusing the internet, I came across this fabulous damask fabric.   Isn't it beautiful!!?  It's also quite close to and reminded me immediately of Manic Panic's Shocking Blue.  This wonderful damask fabric has now become the perfect topper for a gothy-themed tablescape!

For this year's Halloween, I thought it might be fun to pay homage to this amazing color.  Blue has always been my favorite color, so why not a blue Halloween!!?  I hope you enjoy the post!


I placed these midnight blue chargers to begin the plate stack.

The chargers were followed by these fantastic melamine (shhhh, don't tell) plates.

Super cool!


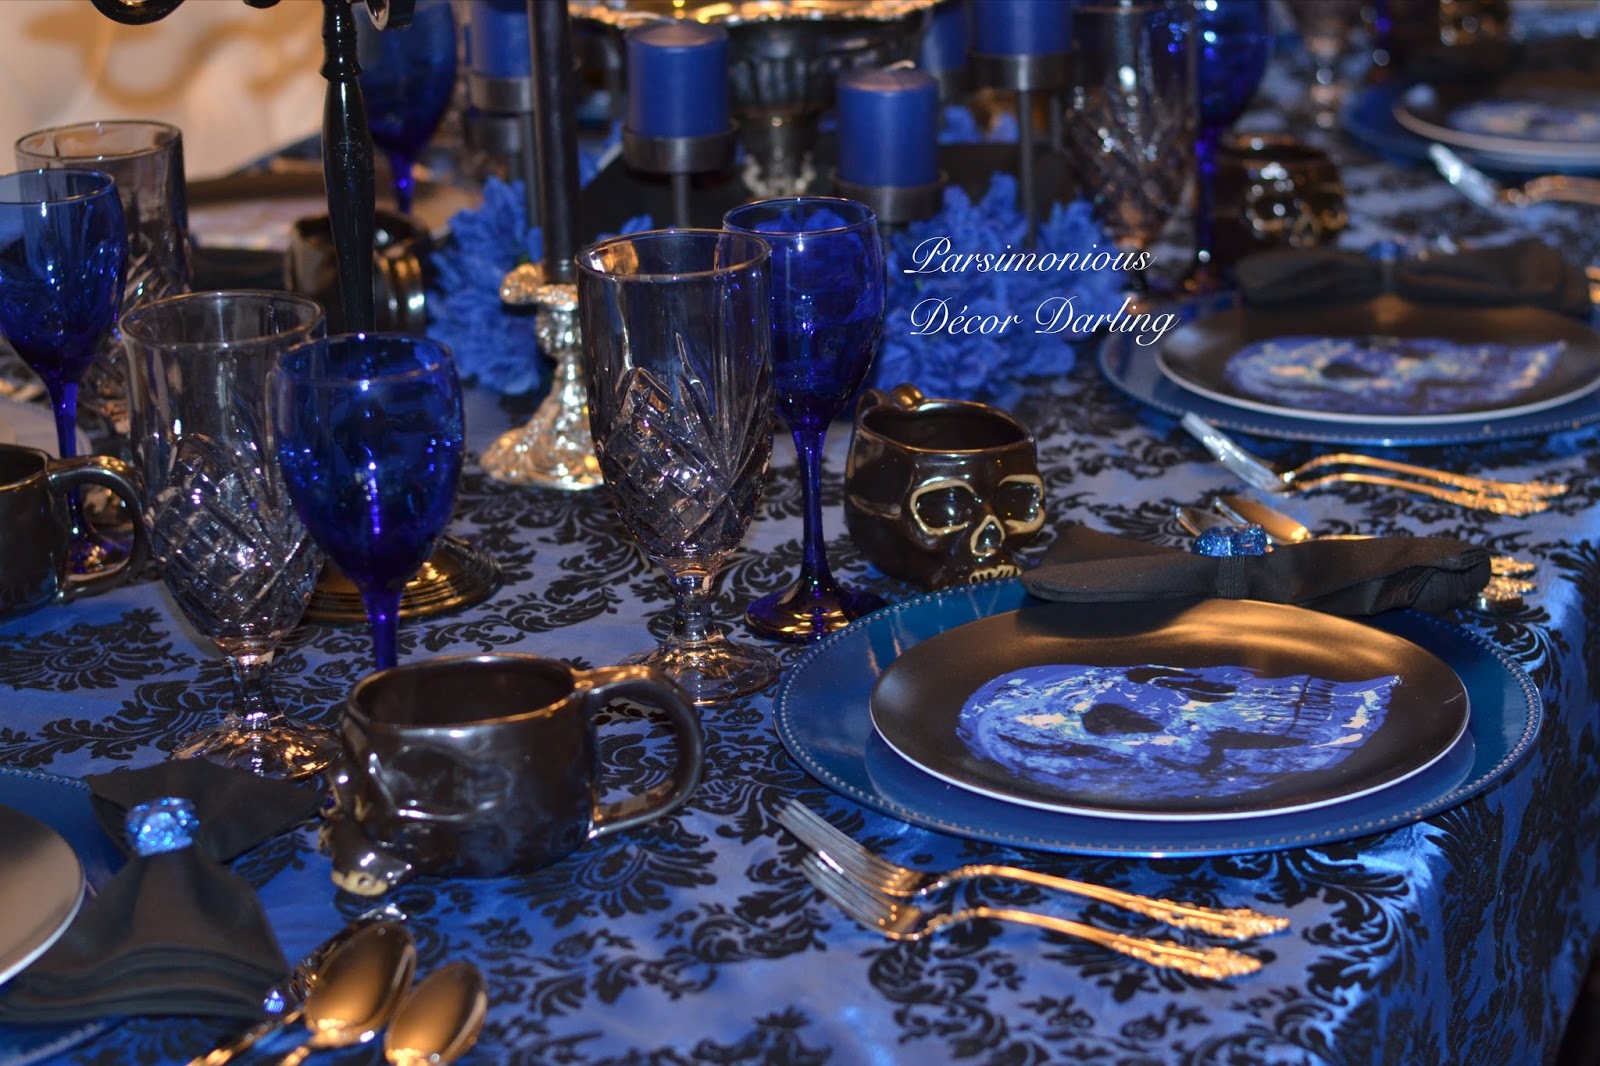
Large smoky goblets, blue flutes, and skully mugs were added for spooky spirits,

and to complete the setting, black napkins held with sparkly skulls and silver flatware.


If you would like to view the tutorial to make these sparkly skully napkin rings, you may visit the post on my blog The Crafting Table here (this photo was snapped with my IPad, and doesn't showcase the true color of the topper or napkin rings, however, it does show the detail of the sparkly skulls).

A more accurate depiction of the color:

To add dimension and a bit of victorian elegance, black candelabras outfitted with elegant blue tapers were placed at either side of the table.


Aren't these gothy-good!!?

I also added silver candlesticks with black tapers at either side of the table setting.


For a spooky-inspired siorée, you can never have enough candlelit romance!!  A centerpiece made of more candles, a silver compote dish, and an abundance of black and blue prettiness brings all the elements of the setting together and completes the tablescape.
 

Closeup.


Completed Tablescape.


Tablescape details.

Place setting.


This setting works just as well in the outdoors, and here are a few examples:


For a little more spooky charm, I added these standing wrought iron elements to either side of the table, also outfitted with flowers and candles.

What a SHOCKING scene!

I used this fabulous batty stand to set my delicious cauldron cakes upon:


Love it!!

If you would like to view the recipe for my Bubbling Brew Cauldron Cakes, you may do so on my blog Parsimonious Pabulum here.  These are such a fun baking activity for kiddos, my girls loved making them!
 

No Halloween party would be complete without spooky sips shared between friends.  My Manic Panic Shocking Blue Toxic Punch is a great beverage to serve this Halloween, and is also kiddo-friendly!


If you would like to view that recipe, it is on Parsimonious Pabulum here.
 

You can view my tablescape with all of these elements added alongside the wonderful music of Bach on my Instagram feed here:


I feel that Toccata and Fugue in D Minor sets just the right atmosphere for Halloween!  It's a classic.  If you are looking for music inspiration, have no fear.  I have comprised a list of fabulously frightful favorites of mine for this Halloween, and you can pin it if you like as well!  This is a completely comprehensive list with a little bit for everyone!!  I hope you enjoy it!  If the font is too difficult to read, simply click the photo on your mobile device and it will open an enlarged version of the list!


I hope you are cozy, warm, and due to the events everywhere across the United States and its territories, SAFE wherever you are.  Remember, enjoy the playfulness of Halloween, and never be afraid to let your frightfully fabulous freak flag fly!!


Until next we meet--


From my collection:
Blue chargers, generic, CV Linens
Skull "Dead Earth" melamine plates, custom made for Zazzle by Spooky Things
Black candelabras, found on Amazon
Silver compote dish used in centerpiece, Wallace Silversmiths Baroque Collection, Local Antique
Silver flatware, Wallace Silversmiths Antique Baroque Collection, Horchow/Neiman Marcus
Smoky crystal goblets, Shannon Crystal Collection by Godinger
Black Skull mugs, Williams-Sonoma
Blue goblets, Libbey Teardrop Cobalt
Batty Cake Stand, HomeGoods
Black napkins, generic, HomeGoods
Silver candle holders, Godinger, Local Antique
Wrought iron outdoor candelabras, Ross Stores
Blue floral, all, Walmart
All candles with the exception of the black tapers were ordered from Amazon.  The black tapers are from Hobby Lobby.

Please feel free to join me and other FABULOUS bloggers as we Happily Halloween HOP along with Amber from Follow the Yellow Brick Home !  Such a fun party full of fantastic Halloween inspiration, and I hope you'll join us!


If you enjoy this post, please visit the archives!  You may also visit my full profile to view my other blogs. Connect with me on my Facebook Page, Parsimonious Décor Darling.   You might like to visit my other blog hubs,  

The Marvelous Maison, a lifestyle blog hub and 
Frugal Fab Fashionista, my fashion blog hub. 

Follow me on Pinterest!!  Please be sure to kindly follow the board guidelines, as it takes time and effort to find fabulous pins across the Internet and Pinterest!  Thank you!  

Thank you for stopping by! ❤