
Hello, friends, and thank you so much for stopping in for a few moments!
I am so flabbergasted that another year has flown by, gracious! It seems like the older I get, the faster the time goes...it truly is astonishing! It is springtime once again, and because I do most of my heavier building during the cooler months of winter (it is just TOO hot and arid here in southern California to do otherwise), I typically am sharing the posts long after the project has been completed. I digress.
A while ago, I shared in this post my process of finding and shopping for outdoor furniture. In the post, it featured the small firepit you see here. However, as the years have gone by, due to the elements, the firepit really began to show its age. I thought, why not build a fireplace that will last longer and be more aesthetically pleasing?
I recently shared the post of my hand-built Spanish-style pizza oven (you can read about the process here),
My idea was to build a double-sided fireplace so that we could enjoy warmth from both the dining area and also the seating area in the back yard. I built the fireplace a couple of years ago, actually before I built the pizza oven, and both have held up amazingly well. Please keep in mind as you read this intermediate-level post, I am a novice and in no way an expert, and there are mistakes I made that in hindsight I would change. I do, however, hope you enjoy the post and find it inspiring.
To began the build of my fireplace, I first set about building a foundation. The foundation was created by stacking and aligning concrete cinderblocks as you see here. I sporadically added a concrete mixture in cells with rebar here and there to reinforce the structure.
To adhere the blocks to one another, I used a heavy duty construction adhesive that is weather-resistant.
Along with being strong and weather-resistant, this adhesive is also indicated for masonry.
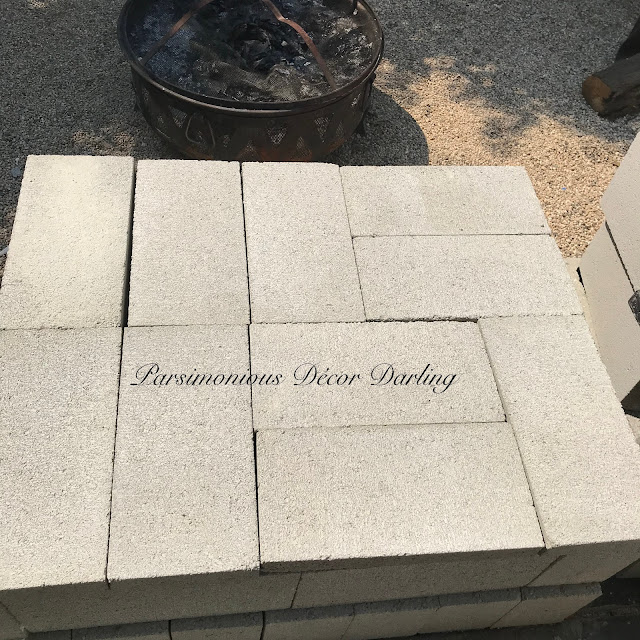
Once the cells were filled here and there, I used the same adhesive to add concrete cinderblock caps, creating a platform foundation.
I measured the blocks to estimate the lay-out, drawing in pencil where the blocks would be placed.
Adding a liberal amount of adhesive.
Then, I set them in place.
Now here is where I likely made my most grievous misstep: Building the sides of the oven. I wanted the oven to have a smaller footprint, so when I built the sides of the oven, I opted NOT to stack the cinderblocks the typical way. Instead, I stacked them on their sides.
To reinforce, I DID fill each cell full of concrete-cement mortar, broken brick, and I also used rebar to strengthen the structure.


The rebar, extra stone, and concrete-cement mortar mix give the cells extra strength. I haven't had any issues three-plus years on now, but I would not recommend doing it this way, as it is likely more efficient and stronger to lay the blocks the other way, or opt to use a smaller brick. I digress.
After ensuring the structure was level,
for another element of stability, I added extra layers of staggered bricks across the tops of the sides, and used concrete mortar to bond each of the elements together.
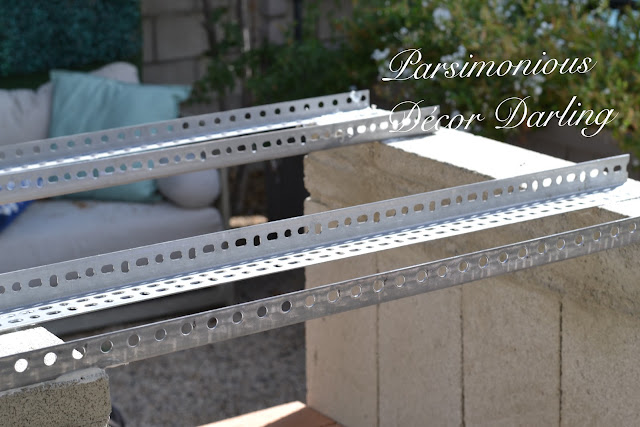
To build the upper part of the fireplace, I first laid the heavy-duty slotted angle bars in position to determine where they needed to placed in order to fit the blocks I would be using.
I used a pencil to mark where the angles would sit.
I marked where the corners would sit with blue painter's tape. This ensured that they were equally aligned and level.
Once the sides of the oven walls were built, the cells were filled and cured, and the mock outline of the oven top was calculated, I set about building the fireplace floor. I used heavy-duty fire bricks, because they can withstand extremely high temperatures. To place the bricks for the fireplace floor, I first set them in mock position to see where they would lay,

placed a liberal amount of adhesive,

re-laid them in the previous calculated footprint, and gently tapped them into place using a rubber mallet. I allowed them to set.

After the bricks were set in place, to create a sturdier, more fire-resistant box for the fireplace, I used heavy-duty fire-retardant hardiebacker board. I measured
and cut the board to size. I did not glue into place just yet, in case I would need to adjust the size later. I set the cut boards aside and went about building the top portion of the fireplace.

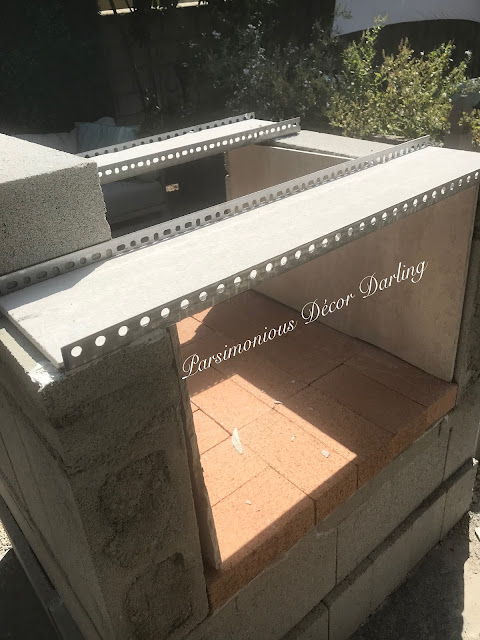
To begin that process, I glued the metal angles into place where I had previously marked. I used a liberal amount of the construction adhesive to glue the angles into place.
Using gloves to protect my hands from the muck.
Next, I used a drywall t-square to measure more of the heavy-duty fire-resistant hardiebacker sheet, cut it to size to fit between the metal angles,
placed the sheets, again pausing to assure the blocks are level,

then added adhesive and placed the cut sheets into place,
added the cinderblocks, and reinforced the form with a cement-concrete mortar mixture.
I used half-blocks where necessary,
again utilizing liberal amounts of adhesive,
and filling each cell completely full to reinforce the structure.

We are getting close...note that upon building the fireplace top portion, I left a space open here on the front façade. In a few steps, I will reveal why.
Next, I set to forming the chimney. To build the top of the fireplace and chimney, I used a combination of materials. I used cinder block caps, a concrete-cement mortar mixture, and very large cored-out concrete blocks. I wanted the chimney to have three different tiers, with each tier tapering to a smaller size as the chimney goes upward. To build the first two tiers, I used concrete blocks.
I also added a bit of heat-resistant refractory cement on the inside of the chimney.

To make the lowest tier of the chimney rectangular in shape and more aesthetically appealing, I used some thin pieces of wood to build a concrete form.
I built the form around the cinderblock caps I added and used to build the lowest tier.
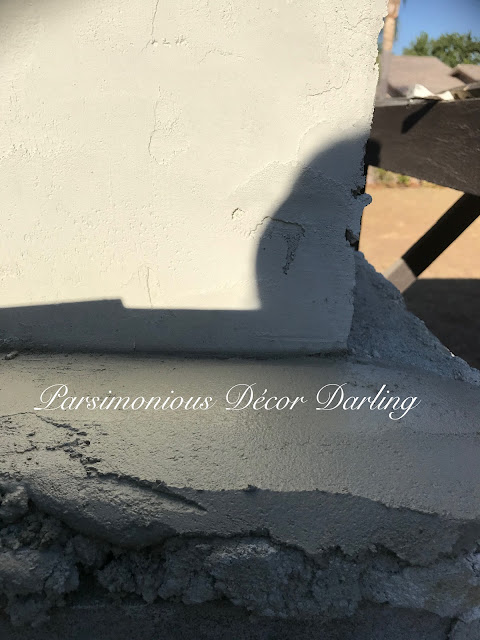
After the form was built and the concrete set, I began skip-troweling the complete fireplace.

I used a combination of two different cements and concrete. Quikwall is excellent for creating a smooth surface, lickety-split!

Cement-all is an excellent bonding agent.
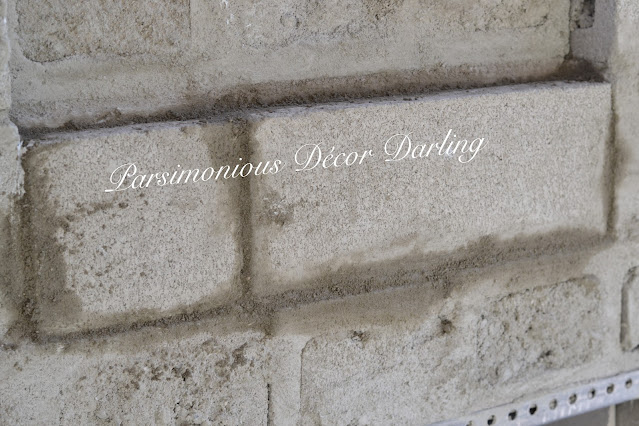
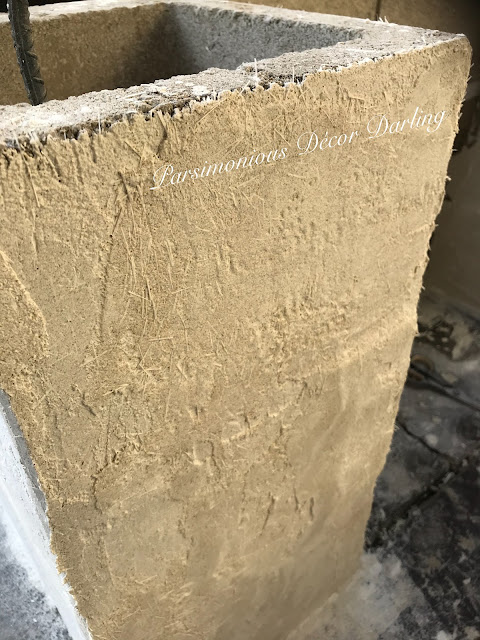
If you look closely, you will regard the fibrous nature of the Quikwall mixture, which is much stronger than simple stucco because of the addition of fiberglass. It bonds to and also reinforces the wall strength. This photo is from my
pizza oven build, but it is a great example, as I utilized the same method for this fireplace.
Right before I completely troweled the façade of the fireplace, I created a void that I would fill with a decorative piece.
Again utilizing the heavy-duty adhesive, I glued thin pieces of hardiebaker into place to create the form.
Here is a peek of the façade after the void was built and I had skip-troweled it almost completely.
On the reverse side of the fireplace, I again used the heavy-duty construction adhesive to first glue two pieces of hardiebacker directly onto the stonework, and also a piece of wood that would act as a mantle.
Closer look.
I used the construction adhesive
to add a square piece of hardiebacker onto the smaller strips. Pieces of cinderblock were used to hold it in place as it cured. I also ensured that it was level.
Once the adhesive on the hardiebacker had cured,
I used a notched grout trowel to apply adhesive grout to the square.
This grout works like a charm.
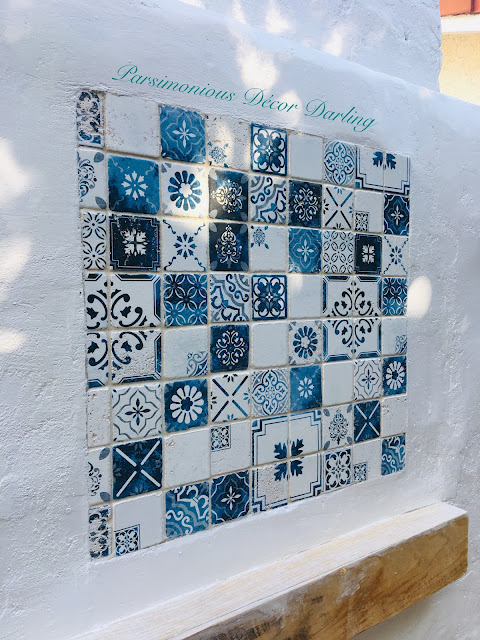
I picked this decorative mosaic tile.
To ensure the tile was spaced properly, I used tile spacers.

I used a bit of painter's tape to hold the tile sheet in place as it cured, and began skip-troweling around the form.
While that was curing, I set about upgrading the decorative element that I would place on the façade of the fireplace.
I had found this lovely plaster (?) decorative element a few years ago in a local antique.

I began by cleaning it vigorously with a toothbrush, making sure to get into those little crevices.

Next, I used a magic eraser to lift the majority of the muck off of the piece.
Nice and clean, but still needs work.
I used a heavy duty primer
to paint the form completely.

After the primer dried, I painted the form a soft French grey, and the used a blue paint almost as you would use a glaze
to add an antiqued look to the piece and also to amplify the decorative elements.

Finally, to protect the piece from the elements, I added a clear coat of polyurethane
before placing it into the pre-built, pre-measured void. I used the heavy-duty adhesive to glue it, and again used painter's tape to hold it in place as it cured.

Closeup.
If you have come along with me in this journey thus far, thank you, lol! Final steps! I used the construction adhesive to glue the hardiebacker sides of the fireplace box into place. I then skip-troweled the sides.
Almost...
Closer...
Sides, finis!!
After all of the remaining voids had been skip-toweled, I painted the whole fireplace bright white.
Closeup of the façade of the fireplace, troweled and painted.
Closeup of the reverse side of the fireplace, skip-troweled, tiled, grouted, and painted.
Fireplace side view. Note I taped the bottom of the fireplace perimeter.
The final step. I added this decorative chimney cap.
Closeup of the tiered chimney.
Ready for cozy evenings! She isn't perfect, but she has served us quite well.
I gave my porch a fresh coat of paint, as shown here.
You can also see here it in this picture of the fireplace box.
The fireplace looks lovely with the French style furniture I picked out earlier.
If you would like to read about my process, you can find it in the archives of my blog
here.
I also upgraded the area with a fabulous rug in coordinating color.
How do you relax during the lovely seasons?
Until next we meet,
-Y
If you enjoy this post, please visit the archives! You may also visit my full profile to view my other blogs. Connect with me on my Facebook Page, Parsimonious Décor Darling. You might like to visit my other blog hubs,
Follow me on Pinterest!! Please be sure to kindly follow the board guidelines! Thank you!
Thank you for stopping by! ❤
















No comments:
Post a Comment