
It is amazing how fast the seasons change; one day you look up and realize you are your parents' age. I cannot believe it is almost Christmas! The first week December for me signifies that it is time to take down the festive Fall fare, and time for rockin' around the Christmas tree!
I am a gal who adores Christmas traditions, so for the outside of my house, I wanted the décor to emulate that feel. First, I placed these festive swags on my door.


On top of my scrolled placemat,

I placed our Christmas welcome mat. It's old and worn, but we've had it since our firstborn was a baby, so it holds special sentimental value for us.


Next, I placed this adorable lamppost box right in the planter just outside my door.

I have a small garden pedestal always in this small area, so I placed the lamppost on top of it.

I sometimes like things pared-down and simple, so to avoid things being over-the-top, I decided to use a very simple garland of greenery adorned with red ribbons around the door. To see how to make this garland, visit the post in my blog The Crafting Table by clicking here.


Here is the whole look.

Finally, at either side of my driveway, I removed my garden lantern from its post,

and hung my handmade poinsettia pomander in its place. To view how to make this ornament, visit the post on my blog The Crafting Table by clicking here.


Being that recently I changed the color scheme inside of my house to cool blues, silver, and grey, I wanted the décor inside of my home to reflect the same theme.
The first thing I decided to do is adorn each of the bedroom doors in my house with a festive wreath. First, I measured the door and placed a small mark with a thumbtack right in the middle of the door.
I used the mark as a guide and placed these simple hangers made by command. What I like most about these is the ease of removal.

All set!

Next, I decorated my bookshelf. I draped a simple garland around the pole and down both sides;

and in each corner I hung a silver bell ornament adorned with two ornaments each, one in blue and one in silver to match the theme of my tree.

I placed a small wreath with a few hanging ornaments and a silver bell ornament in the middle of the shelf.

On to the fun part!! Trimming the ole Christmas tree. First, I decided where I wanted set up the tree. This corner in my entryway looked friendly.


The next step was stringing my lights. There are several methods for stringing lights, but over the years, I've found that the best way to do it is to use these type of lights. These lights have the standard rope, but with long-limbed strands of lights as well.


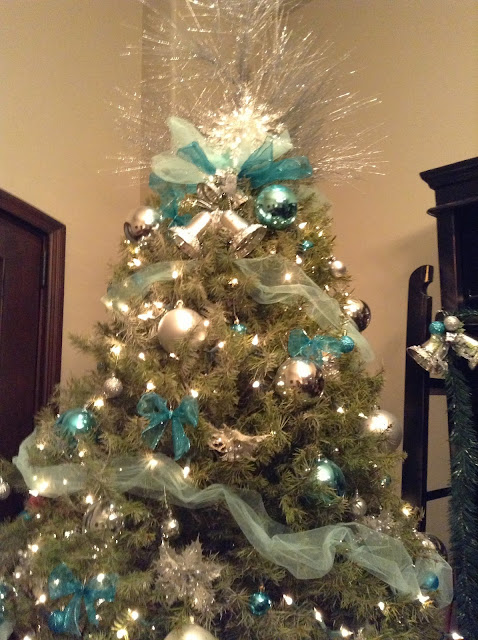
After the lights were strung, I threaded light blue tulle fabric throughout the tree. I like to use tulle in lieu of a traditional garland, because I feel it is a better way to showcase the color palette.

Next, I placed the largest bulbs in sporadic places. Shown here.


I also used the blue ribbon to make several small bow ornaments; simply tie a bow and thread with an ornament hook, close the hook onto the bow.


Finally, I placed my hand-built tree topper. If you would like to view the tutorial for this topper, you may see the post on my other blog, The Crafting Table, by clicking here.

To give the tree an elevated effect, I draped a small table with a wintry tablecloth, placed the tree on top; and finally, added this lovely tree skirt.


The finished look:


Here is a look up close.

If you enjoy this post, please visit the archives! You may also visit my full profile to view my other blogs. Connect with me on my Facebook Page, Parsimonious Décor Darling. You might like to visit my other blog hubs,
The Marvelous Maison, a lifestyle blog hub and
Frugal Fab Fashionista, my fashion blog hub.
Follow me on Pinterest!! Please be sure to kindly follow the board guidelines, as it takes time and effort to find fabulous pins across the Internet and Pinterest! Thank you!
Thank you for stopping by! ❤
So glad that you posted a comment on my blog, so that I could find you! Love your blog and all of the instructions to help us with DYI projects - wow!!! Merry Christmas!
ReplyDeleteThank you so much for visiting, Diane!! Your blog is so wonderful! All my best! XO
ReplyDeleteThis is so pretty! I loved it inside and out! xoxoxo
ReplyDeleteThank you, magpie. ;)
DeleteThanks for sharing.
Thanks for dropping by. Your house looks fabulous! Love your front door. I will look for your followers, so I can follow you along. Happy New Year!
ReplyDeleteThank you so much, Linda!
Delete