

Hello, all! Thank you kindly for stopping in for a visit today!
It seems that finally, the winter has bade adieu, and that springtime is imminent. Spring will officially begin in a couple of short weeks, and this week, the weather is catching up. This week, the rains will be interrupted with sporadic bouts of sunshine, at least according to the forecast. With the cold and frost relenting, this is the perfect time to begin thinking about planting.
Recently, I shared in this post the build of my raised garden beds,

and in this post, how I added the structural decorative elements.

Today, I am at long last sharing how I added the pea gravel, how I began to finally get my hands into the wonderful soil, and planting! I am also sharing other exciting happenings 'round the garden. I hope you enjoy the post!
Recently, I shared here how I added pea gravel to the front yard in lieu of grass.

Using the exact same process, I also added the same gravel in the enclosed garden area that I've built.


Once I added all of the pea gravel, I filled the planters with more soil.

In each of these planters, I used a combination of Miracle-Gro raised bed soil,
Kellog's organic raised bed potting mix,

garden and food safe insecticide,

and Miracle-Gro moisture control potting mix. I feel this soil will really be helpful here in the arid region where I reside.

All of those soils and the insecticide were mixed by shovel and hand trowel until they were combined altogether. 

To each planter, I also mixed in a bit of coffee grounds. There are many benefits of adding coffee grounds to your soil. As coffee grounds break down, they release nitrogen, potassium, and phosphorus which help promote growth of plants. The high nitrogen level in the grounds can also prevent weed growth and absorb heavy metals that can contaminate soil. Coffee grounds also help the growth of microorganisms, which in turn makes for a healthier, more balanced soil. Coffee grounds also can help prevent garden pests such as ants, slugs, and beetles.

After churning in the coffee grounds with a hand trowel, finally, the soil is ready for planting!

I purchased these adorable plant markers from RealSteel.

Closer look. Now that we have all of our accoutrement, let's get planting!


In one planter, I sowed plants that would be perfect for topping pizzas, because this enclosed garden is just adjacent to my DIY Spanish Colonial Woodfired Pizza Oven.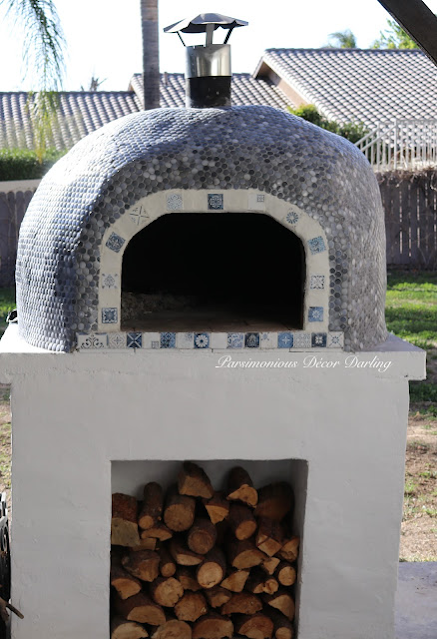

I included basil,


The plants arrive live. I carefully removed them from the box.

I gingerly removed the plastic.


I included basil,

green bell peppers,

rosemary,

oregano,

and cilantro.

A couple of weeks on.


In another planter...garlic, planted from cloves:

in the dirt, sprout facing skyward.

Labeled.

Peeking out.

A few weeks later.


Onion, planted from bulbs.

Hello, there...

They've come up quite nicely as well. A few weeks since planting.


I also planted Thai basil. So fragrant and lovely! Delicious!

In the planter where it is shadier,

I planted spinach

and a variety of salad lettuces.

A few weeks on.


In the shady spot, I also planted strawberries.

A few weeks later...almost ripe!

In another two of the sunnier beds, I planted tomatoes,

A bit later...

chocolate mint,

broccoli,

and cauliflower.

A few weeks later, here are the broccoli and cauliflower plants.

I also refreshed my cherub planters. Flowers galore!


Freshly planted.

A few weeks on...just in need of a bit of cleanup.


Spectacular color and fragrance!


To boost all of the veggies, fruits, and flowers, I added a bit of Moon Juice from Moon Nurseries. It helps promote growth.

For the final addition to the garden thus far this season, I planted a beautiful climbing rose for the arched garden gate entrance. The rose I opted for is this gorgeous climbing rose from Heirloom Roses. It is called the White Eden. These photos are from the Heirloom Roses website.

I loved its gorgeous, creamy color.

The plants arrive live. I carefully removed them from the box.


I gingerly removed the plastic.


The roses arrive with comprehensive instructions.

Removing of the landscape material and cardboard.

Dig, dig, dig.

The instructions state the hole should be approximately two feet deep by two feet wide.
Right hand side of the gate.

Left hand side of the gate.

Once the holes were dug, I created a mixture one shovelful at a time of Miracle-Gro specialty soil for roses,

mixed in with regular soil churned with worm castings from Heirloom Roses.

This was a long, labor-intensive task. Each shovelful was mixed thoroughly. Once the treated soil, worm castings, and regular garden soil was mixed and filled into the hole leaving approximately two to three inches of room,

I placed the roses into the ground. I made sure to lean the plant toward the trellised gate, a tip I learned here at David Austin Roses.
Left side of the gate.

Right side of the gate.

Finally, I filled in the remainder of the hole

and marked them.
Left side of the gate.

Right side of the gate.

Again, I used markers via the RealSteel website. They offer the option of personalization!

They are doing quite well! I can't wait for blossoms!! Left side.

Right side.

Do you like to tinker in the garden?
Until next we meet,
--Y
If you enjoy this post, please visit the archives! You may also visit my full profile to view my other blogs. Connect with me on my Facebook Page, Parsimonious Décor Darling. You might like to visit my other blog hubs,
The Marvelous Maison, a lifestyle blog hub and
Frugal Fab Fashionista, my fashion blog hub.
Follow me on Pinterest!! Please be sure to kindly follow the board guidelines! Thank you!
Thank you for stopping by! ❤
This is so wonderful. I love what you've done here. Those planter boxes are incredible. I'll be featuring this post at Thursday Favorite Things today. :)
ReplyDeleteThank you so, so much, Pam!
Delete