Saturday, November 23, 2024

Adding Old World Charm to the Home/Antiquing the Doors


Hello friends, and thank you for visiting my blog!

What do you consider your design aesthetic?  Whence do you glean inspiration?  

Over the years, one of the aspects I have noticed about the world of design is that there is one constant.  It is NOT constant, lol.  Trends come.  Trends go.  Although I do enjoy the trends, in my personal space, I prefer classic, timeless design.  I adore a collected, storied look that transcends time and trend.  

I adore homes that have an Old World aesthetic or those that exude European flair.  Though the name designated for Old World style has changed over time and includes several niche genres such as the straight-forward Old World, Mediterranean, Spanish Colonial or Spanish Colonial Revival, Tuscan, Rustic, English Country, French Country, and the latest, Dark Academia...their commonality remains the same:  they include decorative items that sophisticatedly reflect a refreshed outlook of styles from times past.

In our tiny casita, we have adopted elements from many of these styles, and because that is so, I have endearingly termed my specific personal style European Hodgepodge.  

I love the look of rustic, all-wood doors reflected in the Old World manner and I wanted to have all wood doors throughout the interior of my home.  I researched several.  Here are a few examples of beautiful Spanish Colonial and/or rustic interior doors I considered.


Gorgeous.  From DeMejico designs.  You may see this door via their website here


Lovely.  The Puerta Seville, also from DeMejio.  You can see this one here.


Stunning.  From Santa Fe Doors.  You may view this door via their website here.


Although not really Old World, I like the understated elegance of this door from Wayfair.  You can view it on the Wayfair website here.  The price tag for this door is $445.12.


After much thought and looking, I realized that replacing all of the doors in my house would be quite expensive, as I needed a total of 7 doors, or 8 if I wanted to also replace the door leading to the garage.  Most of the sites I viewed had doors priced starting at approximately $1,500.00 and up per door (with the exception being the aforementioned Wayfair option), or there was no pricing at all...which lead me to think the door would likely be extraordinarily expensive.  To replace all the doors would likely cost approximately $15,000 or up to $20,000 with installation.  WHEW!

Well, if you have been here before, you are aware that I like to improvise wherever I can and attempt to beautify with budget-friendly solutions, so I set about making over my existing doors rather than replacing them.  This method was a much more economical way to upgrade my doors, I still achieved the Old World aesthetic I admire, and all it required was a few supplies and a bit of labor from me.  SOLD!

The first door I made over was my pantry door.  This door was already a lovely door of natural wood, so I knew staining and adding hardware would make the door a stand-out piece.  


Here are a couple of photos of my pantry door before I went to work.  

This photo is from Halloween a few years ago.


This one Is from Christmas a few years back.  You may view the full tour in the archives of my blog here.  You can really see how plain the door was, ha.


To begin the makeover process of the pantry door, I took it off of the door frame and removed the hardware.

Next, I sanded the entire door, removing any debris and/or clear polyurethane on the door.

Once completely sanded, I stained the door using this beautiful dark stain I found by happenstance (at Walmart of all places!).  I loved the rich color!  It was $19.97 at Walmart, but you can likely find this stain at most hardware stores.  I opted to use the water-based version for faster drying time and easier clean-up.  I also chose this stain because it already contained a polyurethane finish, which alleviated the need to apply a clear coat after staining.


After I added several coats of stain (allowing dry time between each coat) using soft, clean rags until the door was to my liking,


I added some decorative hardware.  I added this speakeasy grille by Agave Ironworks.  I found it at Lowes for $132.30.  You can view it here.


I added some coordinating decorative clavos (nails) which were also from Agave Ironworks.  They were designated to use on a wood gate, but they worked fabulously on my door.  I found them at Lowe's as well.  They were $55.08 for a set of 20.  You can view them here


Adding the clavos.


Here is a look at the detail of the top of the door after I stained it and added the decorative hardware.  Please note that while I had the door off of its hinges, I also sanded and stained the inside of the door frame to match.


Completed pantry door.  Much better.  I love the way it turned out!  


Next, I set about staining the other doors in the house.  The rest of the doors were not wood, so this was a much more arduous task, and took a lot more work and patience.  Here is my process.  


The first of the remaining doors I renovated and stained was the door leading to my garage. Here is a look at the door leading to the garage before I went to work.


The door was plain white before I made it over.  On the reverse side of the door where my hubby has his workshop and where the laundry is, the door was quite dirty.  I used a magic eraser to clean the door prior to sanding.  


I gave the door a light sanding, then I used a universal primer before painting the door.  Next, I painted the door this golden-yellow color, which was close to a natural wood color.  The paint is from Sherwin Williams.


Allow time for the paint to dry completely.


Next, I used the same Kona stain to add a faux wood grain look by wiping on the stain lighter in some areas and darker in others.  This is the first coat.


A couple of coats on.  


Closer.  This task took several coats (approximately 5-8 coats per door or more, if I remember correctly) and hours, allowing for dry time between each coat, so as you can imagine, it took a long time, lol!  Eventually, I set up fans at each door to help the coats dry faster.  If you attempt this process, stain until your liking.


Almost there...just a few more coats!


Completed garage door, as shown last Christmas.  You can see the post, My Tartan and Winterberry Christmas in the archives of my blog here.


Here some of the other doors dressed up.  These photos are from last year as well.  All of these can be seen here on the same post.


Pantry door, dressed.


Some of the hallway doors, dressed for the season (hmm...mental note, need to clean up the finish on the door casing, lol).


Detail.  So much better than stock white!


If you have made it this far, thank you!  If you have enjoyed this tutorial, you may pin any of the photos or this long pin.


Thank you for visiting this post!  Are you prepping for the holiday this week?  

Until next we meet, 

--Y


If you enjoy this post, please visit the archives!  You may also visit my full profile to view my other blogs. Connect with me on my Facebook Page, Parsimonious Décor Darling.   You might like to visit my other blog hubs,

The Marvelous Maison, a lifestyle blog hub and 
Frugal Fab Fashionista, my fashion blog hub. 

Follow me on Pinterest!!  Please be sure to kindly follow the board guidelines!  Thank you!  

Thank you for stopping by! ❤


Saturday, August 10, 2024

Afternoon Tea at the Olde Magnolia Tea Room


Hello, friends, and thank you for stopping in to share a few moments with me!

If you have been to my blog before, you are well aware that I adore tea and that I am also an avid collector of teapots, teacups, and all manner of other tea pretties.  I also love to take tea.  In honor of national tea week, which commences on August 7th and ends August 13th, today I am sharing a tour I took several weeks back of a sweet little tearoom tucked away in a picturesque neighborhood in Upland, California.
  
My daughter and I stumbled upon this delightful place by mere happenstance, and though we were not able to indulge when we first found it (reservations are required), when we did dine a few weeks on, I found it quite lovely.


 Let us begin with the beautiful tree-lined walk.


The quaint architecture of this building immediately caught our attention!  It lends itself to such a charming atmosphere. The beautiful old brick...those neoclassical columns!  So pretty.


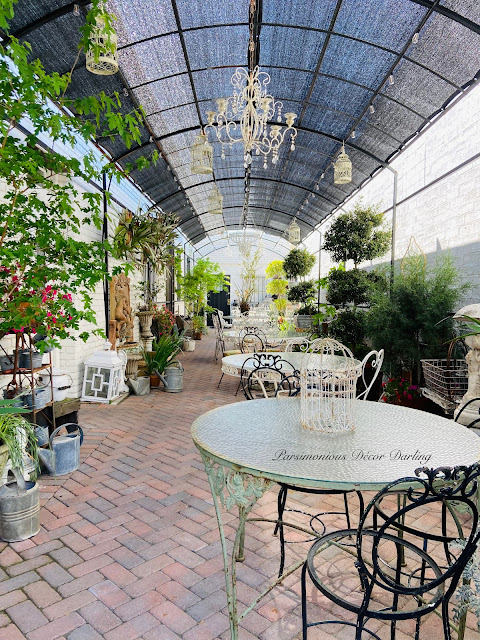
Just to the right of the structure sits a patio outfitted with antique furniture, plants, and art. 


Let's take a peek inside.  Just darling!


The old-tyme lettering of the signage on the window featuring patinaed lace curtains indicates the charm that awaits.


Inside is a sweet little tea house decked out with a darling collection to admire as you partake in the lovely fare offered.  This photo is from the official website.


Gorgeous molding, wallpaper, and hatboxes galore.


Sparkly chandy.


Tea time.  My favorite was the Earl Grey Cream.  Delish!


The host was an absolutely charming chap, and informed me the lovely delicacies are all made in-house!  So delightful.


There is even a little shop!

Here are a few more shots from the official website:


Outdoors:


Indoors:


All in all, this was a wonderful day out with the family, I  would definitely revisit.  Do you celebrate tea week?


Until next we meet, 

--Y


If you enjoy this post, please visit the archives!  You may also visit my full profile to view my other blogs. Connect with me on my Facebook Page, Parsimonious Décor Darling.   You might like to visit my other blog hubs,

The Marvelous Maison, a lifestyle blog hub and 
Frugal Fab Fashionista, my fashion blog hub. 

Follow me on Pinterest!!  Please be sure to kindly follow the board guidelines!  Thank you!  

Thank you for stopping by! ❤


Monday, May 27, 2024

So, This is Fifty?

Hello, beautiful people in the bloggerverse and beyond!  I hope all is well with you and yours.  Today I am sharing a more personal, reflective post.  I hope you'll bear with me and enjoy.

This year marks a couple of special milestones for me; this year I will turn fifty years old.  I will also celebrate 30 years of marriage to my husband.  It is stunning to me how fast I got here.  

I look at photos of a younger me and I see in that young woman's eyes the idealism of youth, and perhaps even a tinge of naïveté.


An amused side-eye from my current self.

As a person who often busied herself with not only all of life's hustles, but also the mundane, I have found time extraordinarily fleeting, and it does my head in how quickly the years have passed.  I often think of one of my favorite lines of dialogue from the film Legend which is one of the most treasured of my youth.  The dreams of youth are the regrets of maturity.   I first saw this film in my teens and I wholeheartedly believed it. 


Here I am, approximately thirty-five years on since I first saw it, and I ask myself, has this tenet held true?  Well in some aspects, without question...so here is some advice I would give my younger self:

Oh, you sweet Summer Child, lol.  Do come closer.


To the idealism of youth:  Never lose it.  Try not to get bogged down in the seriousness that is life.  Remember to enjoy the journey.  It is ok to chase the whimsy.  It is okay to sometimes allow yourself to indulge in the alluring details life has to offer, and to even admire the nuance that some may find prosaic.  You will see that same idealism reflected in your children's eyes; and you will realize:  You will hurt.  You will feel.  You will fear. You will stress.  But you will also love.  You will care.  You will admire.  You will inspire.

To the vanity of youth:  You may not remain a size 00 your whole life, but this body is a strong body.  It has carried six and birthed five children.  It has provided loving protection for those children.  It builds things.  It teaches.  It shows its age, but those markers of that age are to be admired rather than abhorred. 

Do not be afraid to be yourself.  I hate to admit, I am still working on this one.  I am a contradiction in that while I am a very private, reserved person in real life, I am much more relaxed and congenial online.  I am very goofy and silly, a complete nerd...yet I find that it is tough to share that part of myself when I don't have the anonymity of being online.  I am learning not to care so much and to allow myself to just be.  

Most importantly, give yourself grace.  Stop being so hard on yourself, it's going to be ok.  It may not be exactly what you idealized, but life's journey will be beautiful just the same.  

Here is a photo of myself and Mr. Parsimonious, from what seems like yesterday it went by so fast.  Thirty years of marriage later, I am glad you have journeyed with me.


Until next we meet,

--Y


If you enjoy this post, please visit the archives!  You may also visit my full profile to view my other blogs. Connect with me on my Facebook Page, Parsimonious Décor Darling.   You might like to visit my other blog hubs,

The Marvelous Maison, a lifestyle blog hub and 
Frugal Fab Fashionista, my fashion blog hub. 

Follow me on Pinterest!!  Please be sure to kindly follow the board guidelines!  Thank you!  

Thank you for stopping by! ❤


Wednesday, April 10, 2024

Series: Setting the Scene for Year-Round Enjoyment. Part Six: Cozy Evenings


Hello, friends, and thank you so much for stopping in for a few moments!


I am so flabbergasted that another year has flown by, gracious!  It seems like the older I get, the faster the time goes...it truly is astonishing!   It is springtime once again, and because I do most of my heavier building during the cooler months of winter (it is just TOO hot and arid here in southern California to do otherwise), I typically am sharing the posts long after the project has been completed.  I digress.  

A while ago, I shared in this post my process of finding and shopping for outdoor furniture.  In the post, it featured the small firepit you see here.  However, as the years have gone by, due to the elements, the firepit really began to show its age.  I thought, why not build a fireplace that will last longer and be more aesthetically pleasing?


I recently shared the post of my hand-built Spanish-style pizza oven (you can read about the process here),


My idea was to build a double-sided fireplace so that we could enjoy warmth from both the dining area and also the seating area in the back yard.  I built the fireplace a couple of years ago, actually before I built the pizza oven, and both have held up amazingly well.  Please keep in mind as you read this intermediate-level post, I am a novice and in no way an expert, and there are mistakes I made that in hindsight I would change.  I do, however, hope you enjoy the post and find it inspiring.

To began the build of my fireplace, I first set about building a foundation.  The foundation was created by stacking and aligning concrete cinderblocks as you see here.  I sporadically added a concrete mixture in cells with rebar here and there to reinforce the structure.


To adhere the blocks to one another, I used a heavy duty construction adhesive that is weather-resistant.


Along with being strong and weather-resistant, this adhesive is also indicated for masonry. 


Once the cells were filled here and there, I used the same adhesive to add concrete cinderblock caps, creating a platform foundation.

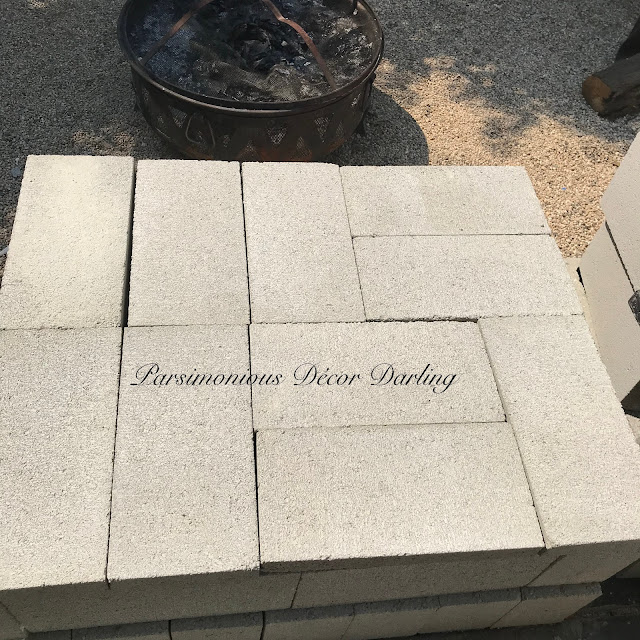
I measured the blocks to estimate the lay-out, drawing in pencil where the blocks would be placed.


Adding a liberal amount of adhesive.


Then, I set them in place.


Now here is where I likely made my most egregious misstep:  Building the sides of the oven. I wanted the oven to have a smaller footprint, so when I built the sides of the oven, I opted NOT to stack the cinderblocks the typical way.  Instead, I stacked them on their sides. 


To reinforce, I DID fill each cell full of concrete-cement mortar, broken brick, and I also used rebar to strengthen the structure.


The rebar, extra stone, and concrete-cement mortar mix give the cells extra strength.  I haven't had any issues three-plus years on now, but I would not recommend doing it this way, as it is likely more efficient and stronger to lay the blocks the other way, or opt to use a smaller brick.  I digress.


After ensuring the structure was level,


for another element of stability, I added extra layers of staggered bricks across the tops of the sides, and used concrete mortar to bond each of the elements together.


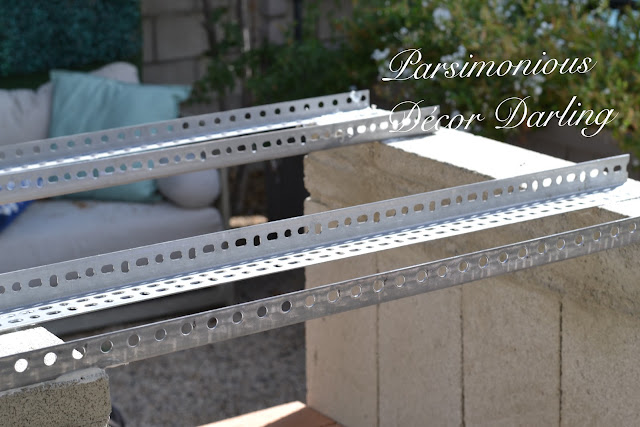
To build the upper part of the fireplace, I first laid the heavy-duty slotted angle bars in position to determine where they needed to placed in order to fit the blocks I would be using.


I used a pencil to mark where the angles would sit.


I marked where the corners would sit with blue painter's tape.  This ensured that they were equally aligned and level.


Once the sides of the oven walls were built, the cells were filled and cured, and the mock outline of the oven top was calculated, I set about building the fireplace floor.  I used heavy-duty fire bricks, because they can withstand extremely high temperatures.  To place the bricks for the fireplace floor, I first set them in mock position to see where they would lay,


placed a liberal amount of adhesive,


re-laid them in the previous calculated footprint, and gently tapped them into place using a rubber mallet.  I allowed them to set.


After the bricks were set in place, to create a sturdier, more fire-resistant box for the fireplace, I used heavy-duty fire-retardant hardiebacker board.  I measured 


and cut the board to size.  I did not glue into place just yet, in case I would need to adjust the size later.  I set the cut boards aside and went about building the top portion of the fireplace.


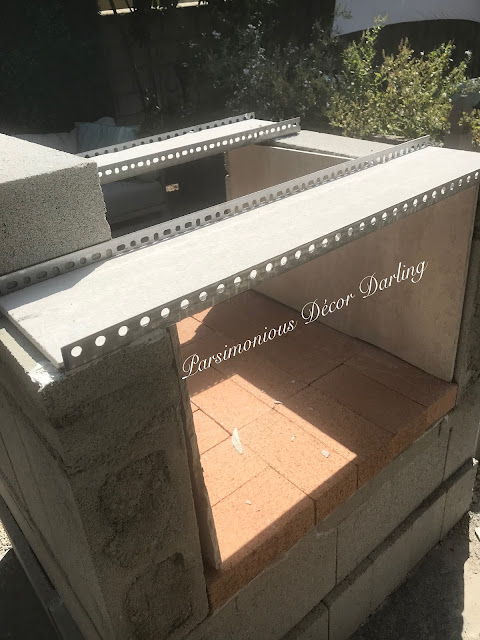
To begin that process, I glued the metal angles into place where I had previously marked.  I used a liberal amount of the construction adhesive to glue the angles into place.


 Using gloves to protect my hands from the muck.


Next, I used a drywall t-square to measure more of the heavy-duty fire-resistant hardiebacker sheet, cut it to size to fit between the metal angles,


placed the sheets, again pausing to assure the blocks are level, 


then added adhesive and placed the cut sheets into place, 


added the cinderblocks, and reinforced the form with a cement-concrete mortar mixture.


I used half-blocks where necessary, 


again utilizing liberal amounts of adhesive,


and filling each cell completely full to reinforce the structure.


We are getting close...note that upon building the fireplace top portion, I left a space open here on the front façade. In a few steps, I will reveal why.


Next, I set to forming the chimney.  To build the top of the fireplace and chimney, I used a combination of materials.  I used cinder block caps, a concrete-cement mortar mixture, and very large cored-out concrete blocks.  I wanted the chimney to have three different tiers, with each tier tapering to a smaller size as the chimney goes upward.  To build the first two tiers, I used concrete blocks.  


I also added a bit of heat-resistant refractory cement on the inside of the chimney.


To make the lowest tier of the chimney rectangular in shape and more aesthetically appealing, I used some thin pieces of wood to build a concrete form.


I built the form around the cinderblock caps I added and used to build the lowest tier.  


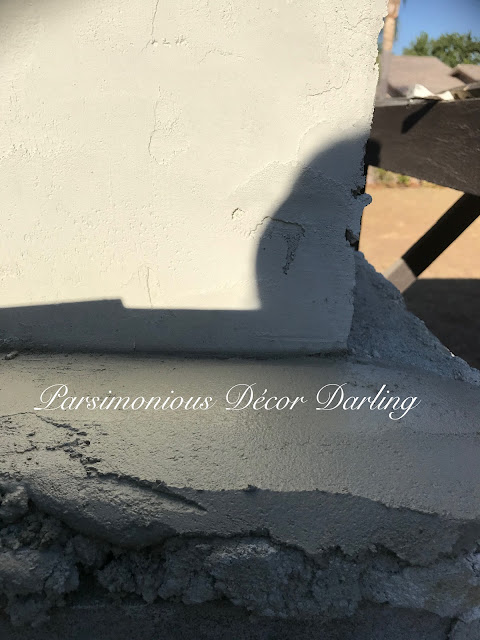
After the form was built and the concrete set, I began skip-troweling the complete fireplace. 


I used a combination of two different cements and concrete.  Quikwall is excellent for creating a smooth surface, lickety-split!


Cement-all is an excellent bonding agent.


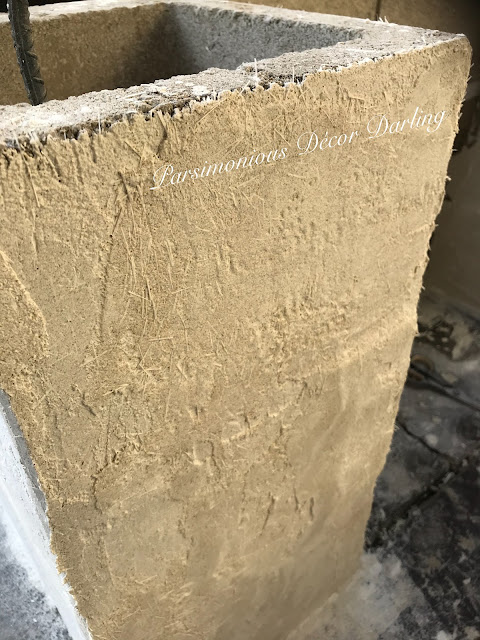
If you look closely,  you will regard the fibrous nature of the Quikwall mixture, which is much stronger than simple stucco because of the addition of fiberglass.  It bonds to and also reinforces the wall strength.  This photo is from my pizza oven build, but it is a great example, as I utilized the same method for this fireplace.


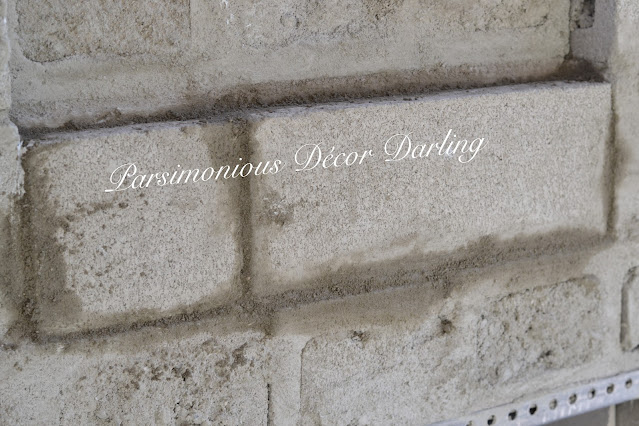
Right before I completely troweled the façade of the fireplace, I created a void that I would fill with a decorative piece.


Again utilizing the heavy-duty adhesive, I glued thin pieces of hardiebaker into place to create the form.


Here is a peek of the façade after the void was built and I had skip-troweled it almost completely.


On the reverse side of the fireplace, I again used the heavy-duty construction adhesive to first glue two pieces of hardiebacker directly onto the stonework, and also a piece of wood that would act as a mantle.


Closer look.


I used the construction adhesive


to add a square piece of hardiebacker onto the smaller strips.  Pieces of cinderblock were used to hold it in place as it cured.  I also ensured that it was level.


Once the adhesive on the hardiebacker had cured,


I used a notched grout trowel to apply adhesive grout to the square.


This grout works like a charm.


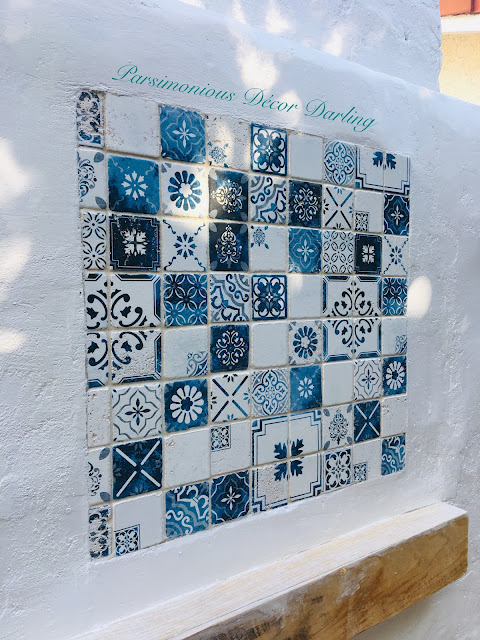
I picked this decorative mosaic tile.


To ensure the tile was spaced properly, I used tile spacers.  


I used a bit of painter's tape to hold the tile sheet in place as it cured, and began skip-troweling around the form.


While that was curing, I set about upgrading the decorative element that I would place on the façade of the fireplace.


I had found this lovely plaster (?) decorative element a few years ago in a local antique.


I began by cleaning it vigorously with a toothbrush, making sure to get into those little crevices.


Next, I used a magic eraser to lift the majority of the muck off of the piece.


Nice and clean, but still needs work.


I used a heavy duty primer


 to paint the form completely.


After the primer dried, I painted the form a soft French grey, and the used a blue paint almost as you would use a glaze


to add an antiqued look to the piece and also to amplify the decorative elements.


Finally, to protect the piece from the elements, I added a clear coat of polyurethane 


before placing it into the pre-built, pre-measured void.  I used the heavy-duty adhesive to glue it, and again used painter's tape to hold it in place as it cured.  


Closeup.


If you have come along with me in this journey thus far, thank you, lol!  Final steps!  I used the construction adhesive to glue the hardiebacker sides of the fireplace box into place.  I then skip-troweled the sides.


Almost...


Closer...


Sides, finis!!


After all of the remaining voids had been skip-toweled, I painted the whole fireplace bright white.


Closeup of the façade of the fireplace, troweled and painted.


Closeup of the reverse side of the fireplace, skip-troweled, tiled, grouted, and painted.


Fireplace side view.  Note I taped the bottom of the fireplace perimeter.


The final step.  I added this decorative chimney cap.


Closeup of the tiered chimney.


Ready for cozy evenings!  She isn't perfect, but she has served us quite well.


I gave my porch a fresh coat of paint, as shown here.


You can also see here it in this picture of the fireplace box.


The fireplace looks lovely with the French style furniture I picked out earlier. 


 If you would like to read about my process, you can find it in the archives of my blog here.


I also upgraded the area with a fabulous rug in coordinating color.


How do you relax during the lovely seasons?


Until next we meet, 

-Y


If you enjoy this post, please visit the archives!  You may also visit my full profile to view my other blogs. Connect with me on my Facebook Page, Parsimonious Décor Darling.   You might like to visit my other blog hubs,

The Marvelous Maison, a lifestyle blog hub and 
Frugal Fab Fashionista, my fashion blog hub. 

Follow me on Pinterest!!  Please be sure to kindly follow the board guidelines!  Thank you!  

Thank you for stopping by! ❤