

Hello, dear lovelies! Thank you so much for stopping by! We are now in the full swing of Spring, and I am loving seeing signs of life all over the garden. It is the perfect time to start planting, or to continue maintaining your perennials and/or to begin refreshing your annuals.
A wonderful way to display your beautiful blooms is in a classic window box. Some time ago during the beginning of the pandemic, I began perusing multiple sites for inspiration, because I had just finished skip-troweling the exterior of my house, but it still looked a little bland. I decided the implementation of window boxes would make for a pretty addition to the newly stuccoed and painted exterior.
I wanted something classic or with European nuances. Here are some of the window boxes I considered:
I found this one to be just gorgeous!! It is The Shipman from the Bunny Williams Collection at Ballard Design. The price tag of this beauty is $489.
Lovely. The Savannah Window Box from www.flowerwindowboxes.com. What I liked about this option is that you have a choice of adding a self-watering system, and also a choice five different finishes for the metal box insert. These vary in price contingent upon size and finishing options, starting at $203.99 for the smallest (24") and $662.99 for the largest (108").


Today, I am sharing a tutorial on how I built lovely, classical style window flower boxes for pennies on the dollar. I hope you enjoy the post!
This is an intermediate level project, so of course there was a bit of trial and error . I initially intended these boxes to sit on the ground just underneath each window, so the material I used did not need to be overly sturdy or hardy. However, since I ended up hanging these boxes, I recommend using a thicker, heavier wood than the particle board I used which is featured in my photos.
To build your box you will need:
Pre-treated wood planks
Measuring Tape
Lattice fence sections
Drill with a forstner or wood/spade bit
Paint of your choice
Landscape weed barrier fabric
Staple gun and staples
Brackets strong enough to accommodate weight of your soil, planter, and flowers
Small gauge nails
Panel nails
Small thin wood sections, or 1 X 1 inch flashing, furring strip, et cetera
Construction adhesive in coordinating color
Sharp razor blade or cutting tool (I used an angle grinder)
Mounting nails or screws intended for masonry
First, you will want to measure the window to see what size you want your window box to be. Once you have measured, cut your boards to size. You will need three boards the length of your window, and two shorter boards for the width of each box.
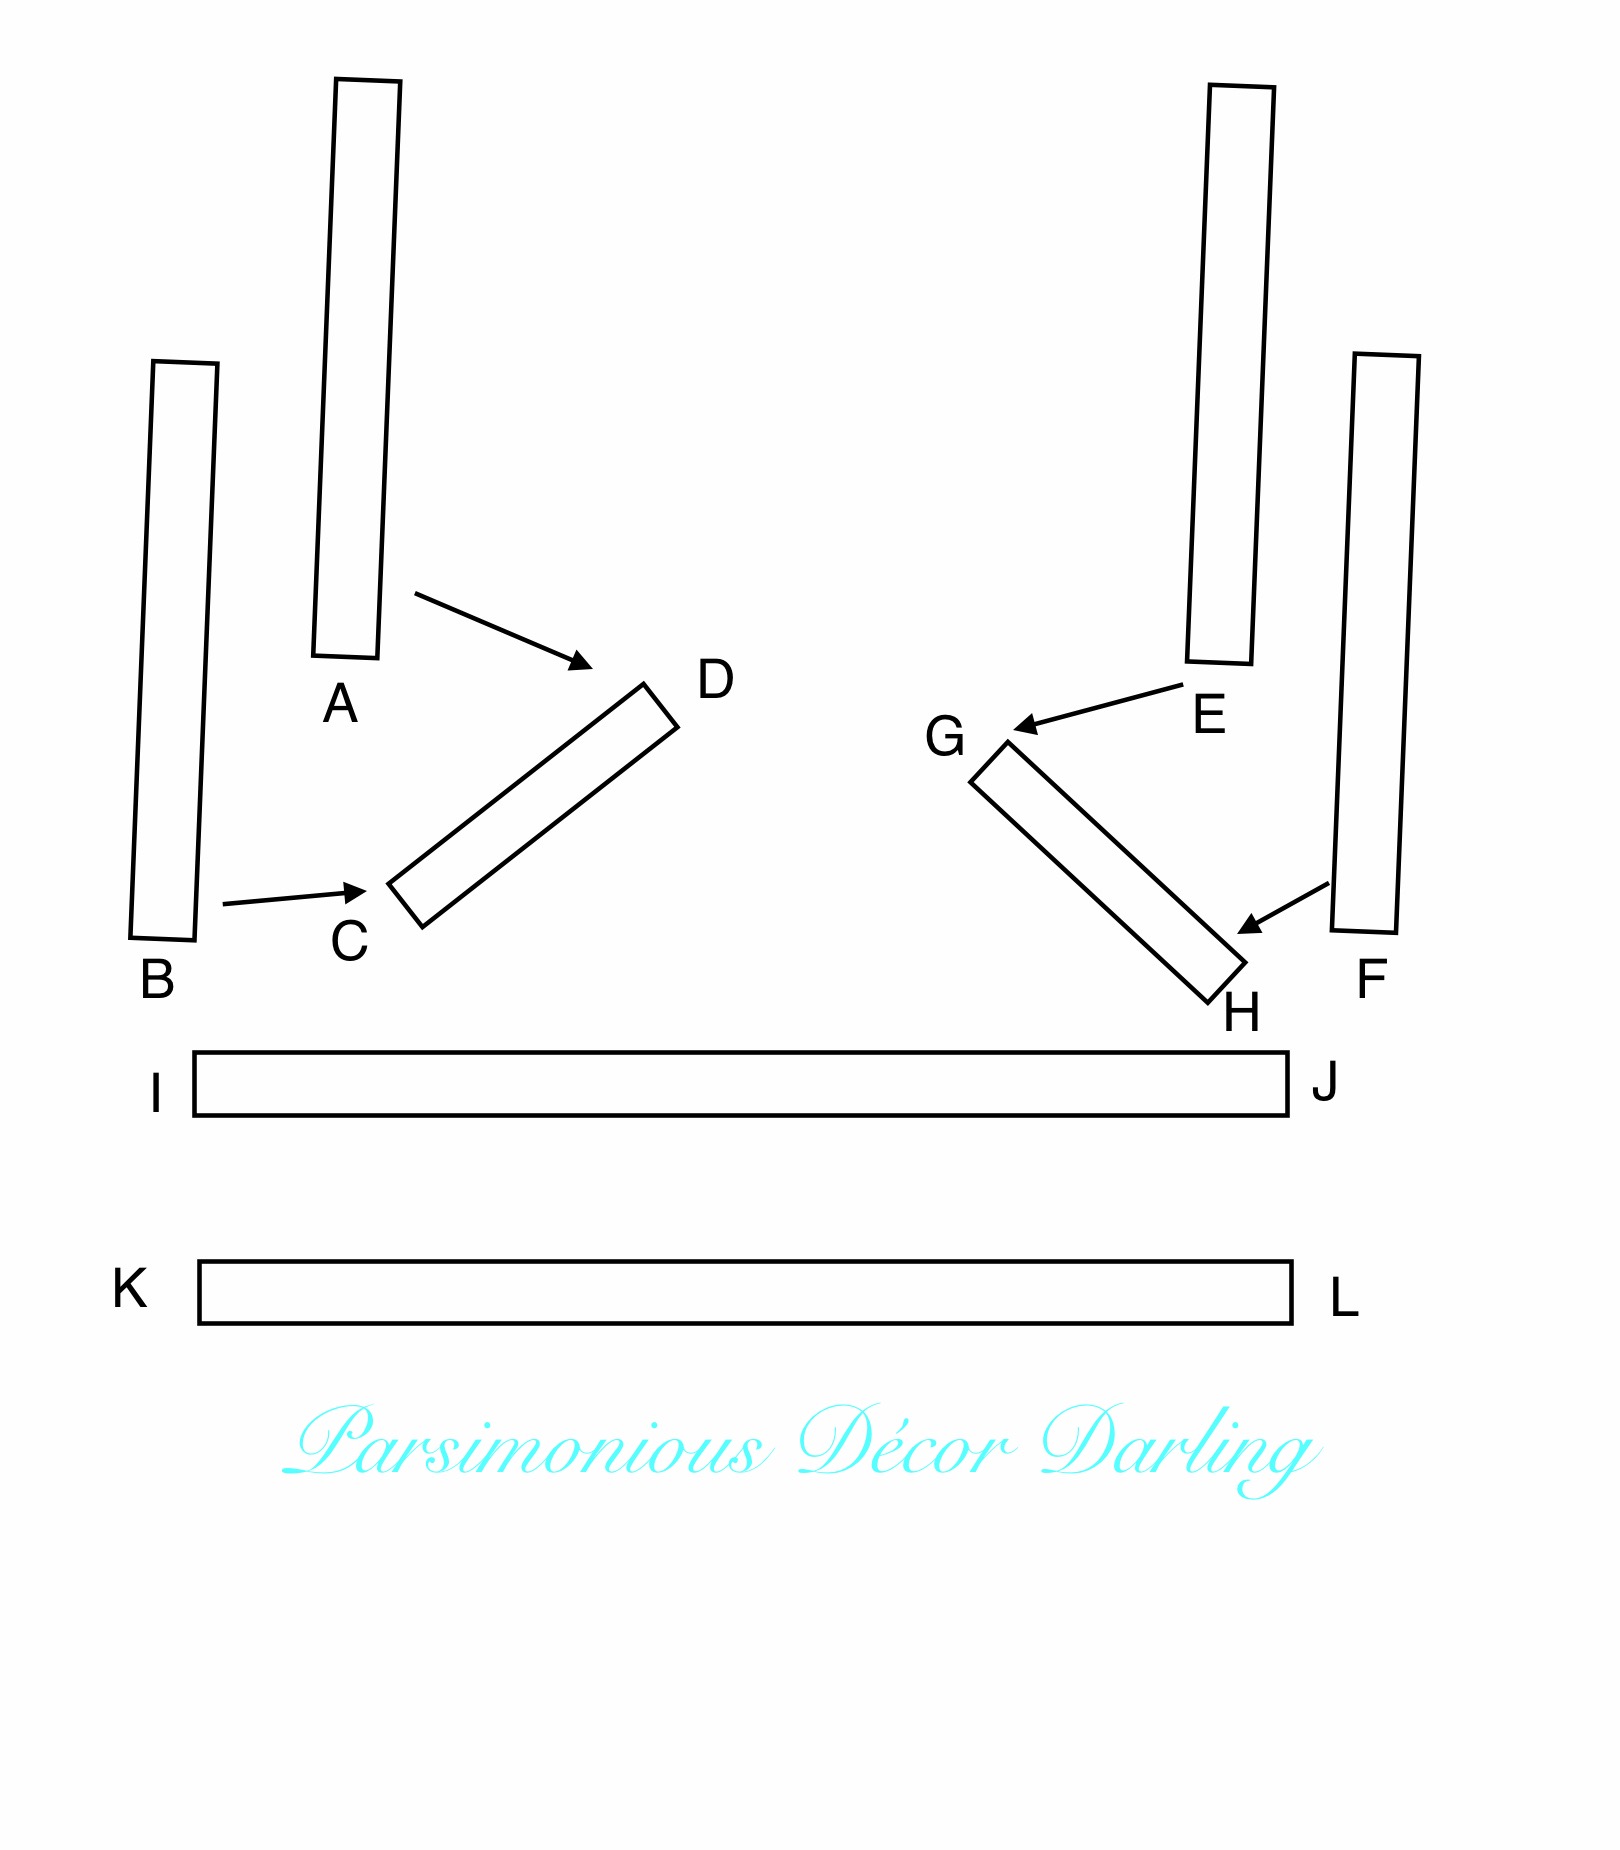
Once measured, you will need to measure and cut the thin pieces of wood to size to coordinate with the height of the box. You will need one for each corner, and one for each bottom length…or eight total for each box. Using the small gauge nails, attach measured furring strip (thin wood pieces) to form a topless rectangular form. You may use the diagram below as a reference. First, create the shorter sides of the form. Attach the side of Strip A to Strip D, forming a 90 degree angle in an inverted L shape. Next, attach the side of Strip B to side C. You should now have a U shape. Repeat the process; side of Strip E to the side of Strip G (forming an L) and the side of Strip H to the side of Strip F, forming the second U shape. Finally, attach side A/D to side I, side E/G to side J, side B/C to side K, and side H/F to side L.

Here is a photo of one of the longer sides, on which I beaded the adhesive.


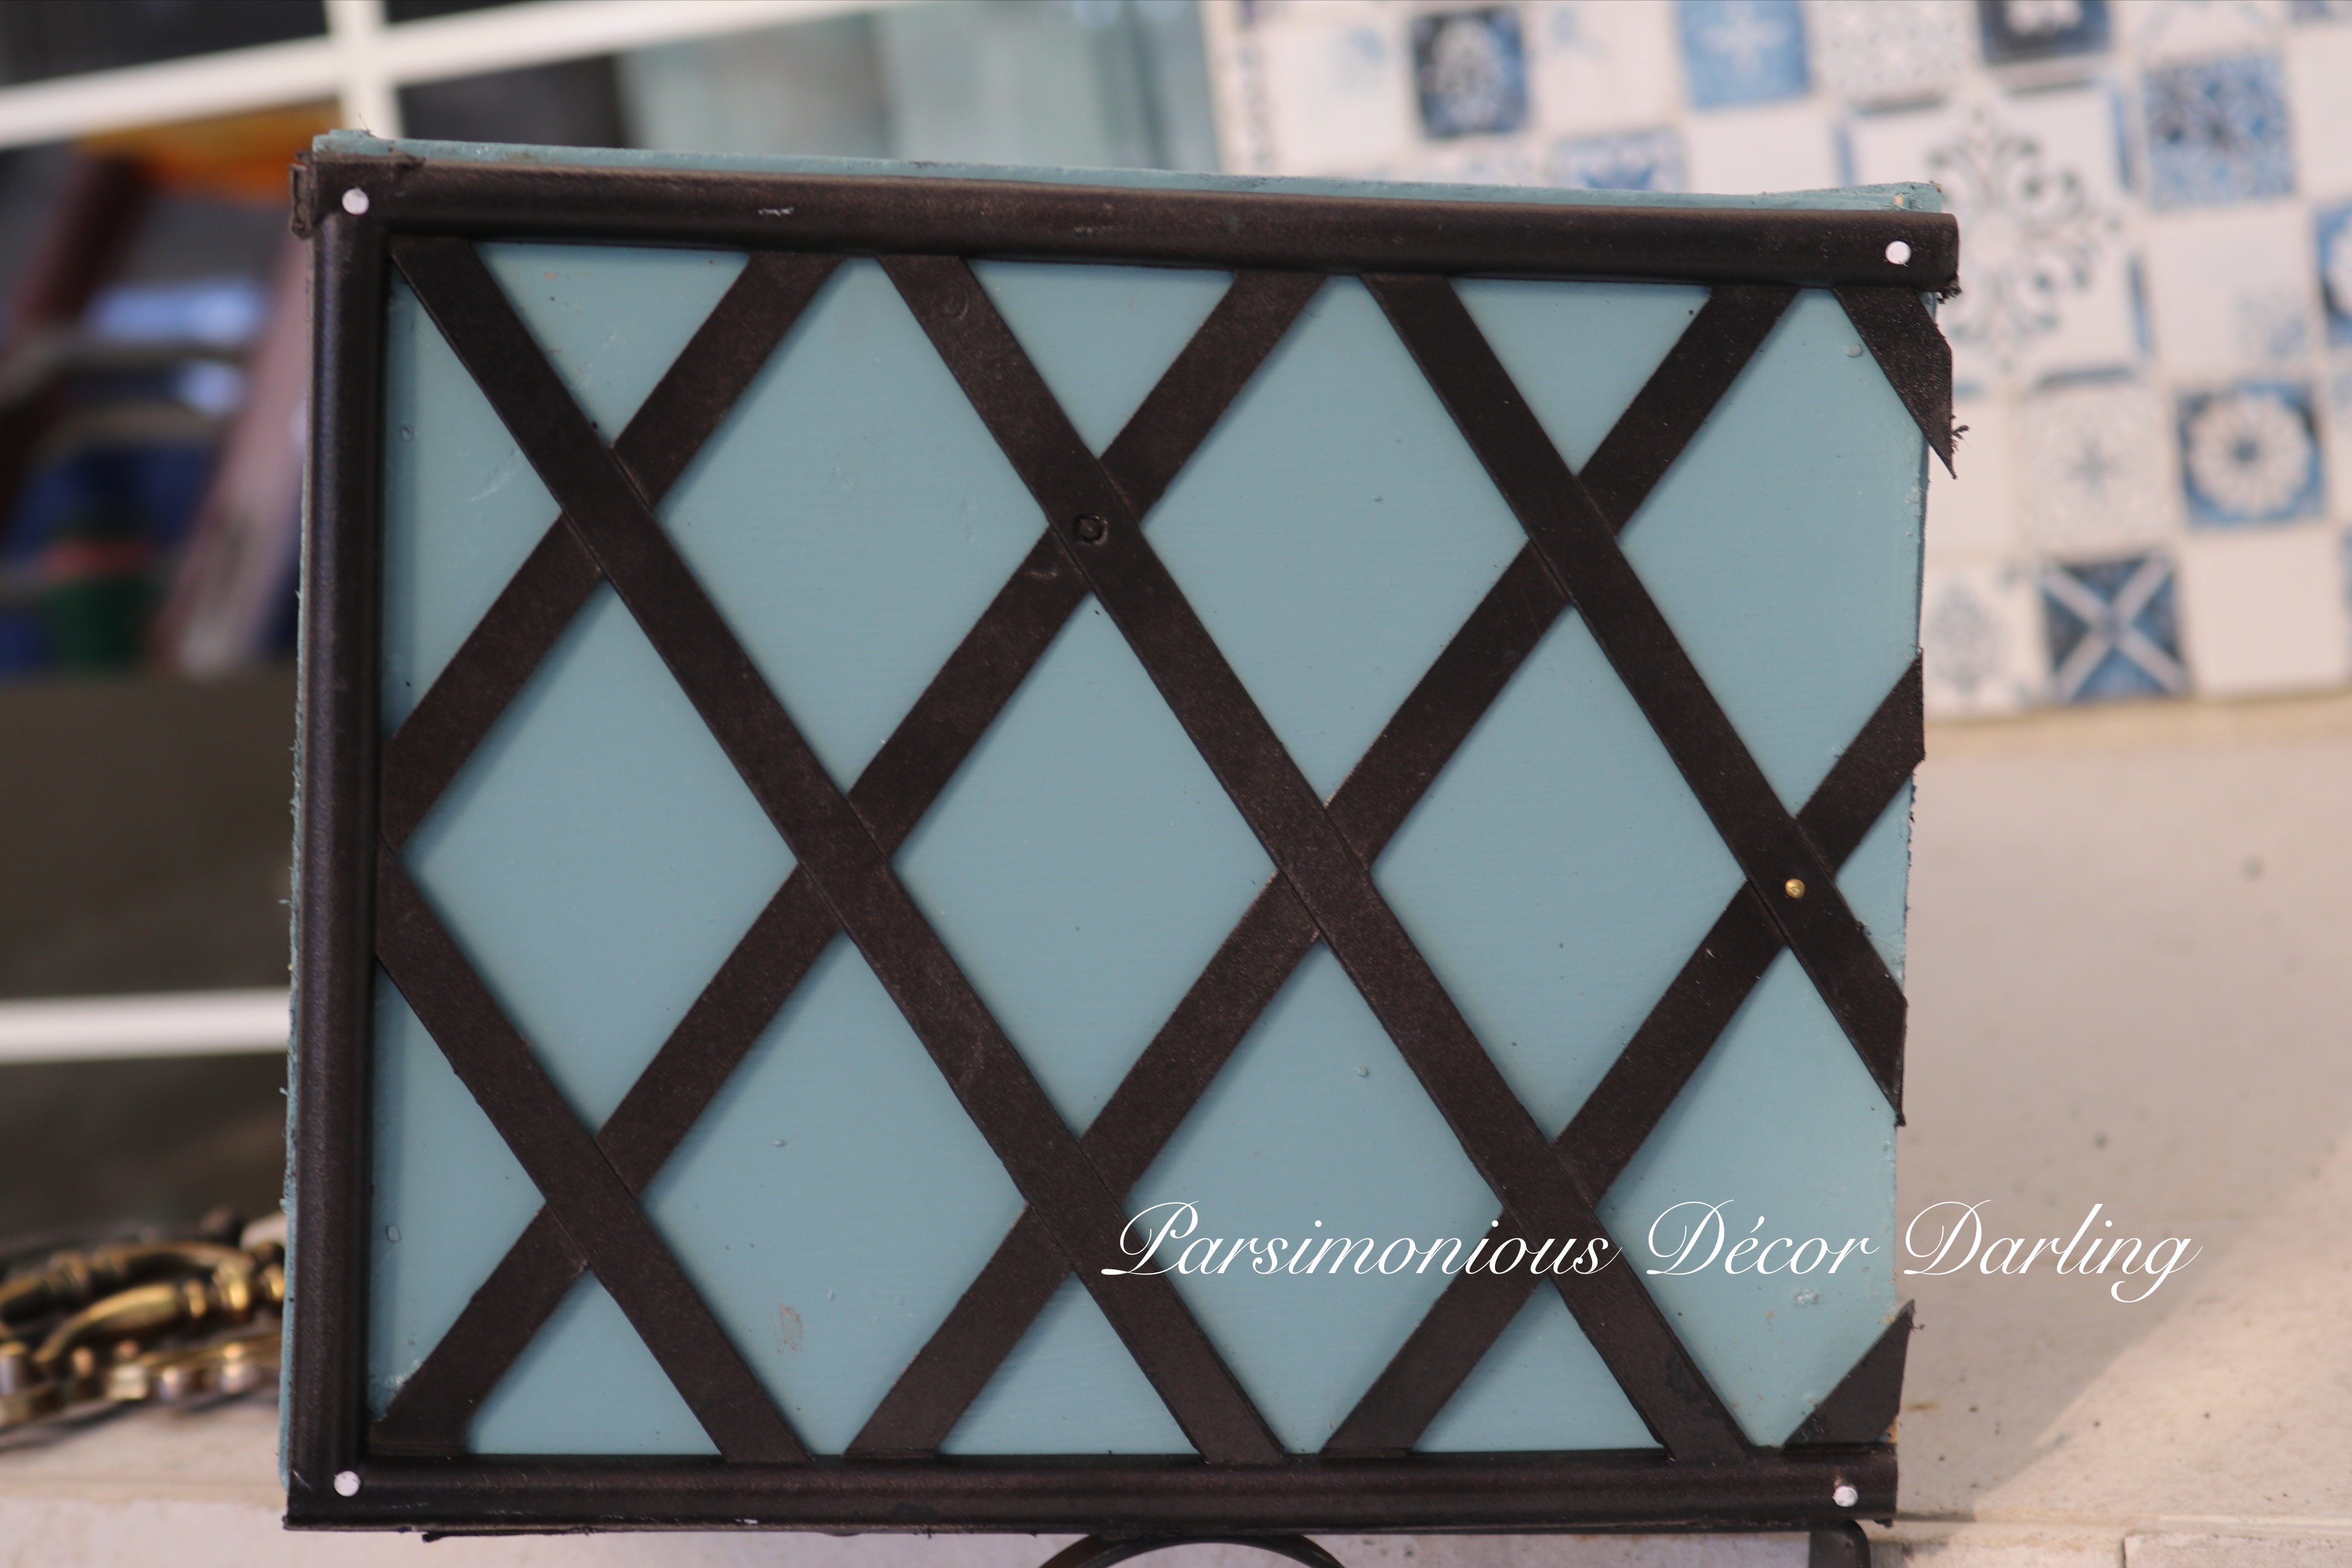


Shown here.


