
Hello, friends in the blogsphere and beyond!! I hope you are having a wonderful new year thus far!
Do you like to follow design trends, or are you a person who prefers to march to their own beat and decorate as you please? I definitely am the latter. Not to say that I don't like updating my space, or that I don't admire spaces that are modern, but this gal loves things that are storied and more often than not something that is classic rather than something that is on-trend but also may fade quickly. I still prefer books over reading from a tablet, or perusing a local antique for a collectible rather than looking at the trendiest catalogue.
When I decorate my home, I try to keep a balance of combining things with history and modern elements so that my space is classic, but never dated.
When my girls were younger, their room definitely reflected a fun and whimsical ideology! Both of my girls adored pink and purple, and both took ballet lessons. The room they shared:
Sugar, spice, and everything nice! Soft muted purples, pinks, cool white, and a punch of black from the damask pattern I painted on one side of the room


My eldest daughter was disciplined, quiet, studious;

and my youngest was exuberant, a spitfire, sharp as tacks with a clever sense of humor well beyond her years.
Now that both girls were a bit older, we decided we wanted to update the room and make it more a more soothing, relaxing space, and also make it more cohesive with the rest of out home's décor without losing personality.
I also wanted the space to be classic: to endure for a few years at least, which would alleviate the task of having to change it too soon.
I do believe the impetus of changing the girls' room came when I was gobsmacked at finding this absolutely gorgeous armoire, a coordinating dressing table, queen size headboard, a very large bureau and a smaller dresser with side table and a dressing platform with mirror made by the Hoke Furniture Company all for less than $1000!!

I immediately fell in love with the ornate details.

Sublime!!

The best part was that all the pieces were nearly perfect except for a minimal amount of flaws like the one here, which I felt wasn't noticible enough to pass the beauties up for!

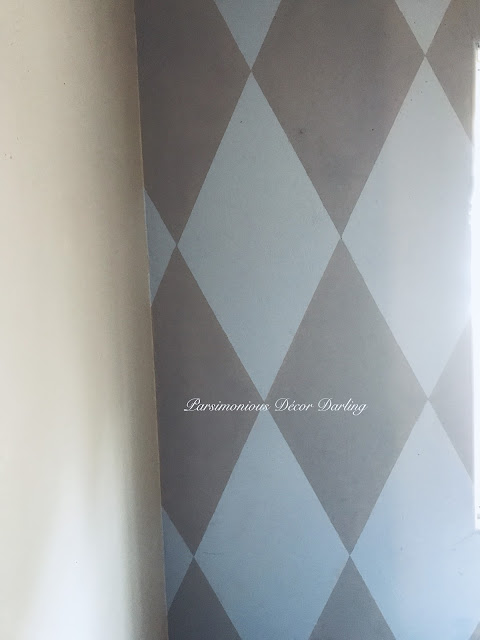
Next, I chose a color palette more complimentary to our home. I chose soft blues and greys. I decided to paint an accent wall in a harlequin pattern to add back a bit of a whimsical aspect.
Next, I wanted to make bed crowns for each of my girls. I had seen several pretty ones while perusing the internet, and they varied in price and quality.
This one from Restoration Hardware called the Gilt Demilune is gorgeous, but very pricey at $419! You can purchase it here.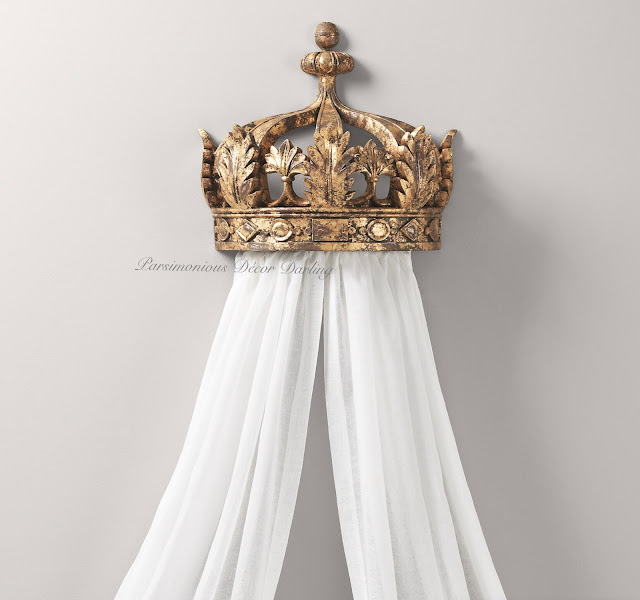


and even a couple from Walmart's Octorose Collection, like this Tiara in Antique Gold, $159, sold here,

In the end, I came upon these at the 99¢ Store just by happenstance as I was considering these options, and wondered if I could make them over. I decided to give it a chance.

I began by giving them each a good coat of primer.

I then painted them in a color I thought would look appealing with the walls and bed. I chose this antique blue furniture paint from Maison Blanche.
First coat. You can still see a bit of the white primer peeking through.


The final coat before drying.
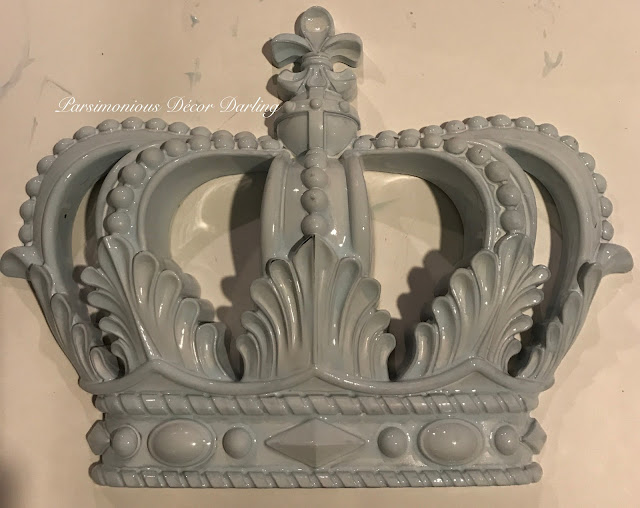
Once dried, I used a simple glaze in dark bronze to bring out the ornate detail, carefully brushing the glaze over the piece and using a paper towel to take it back off here and there until I achieved the antique look I wanted.

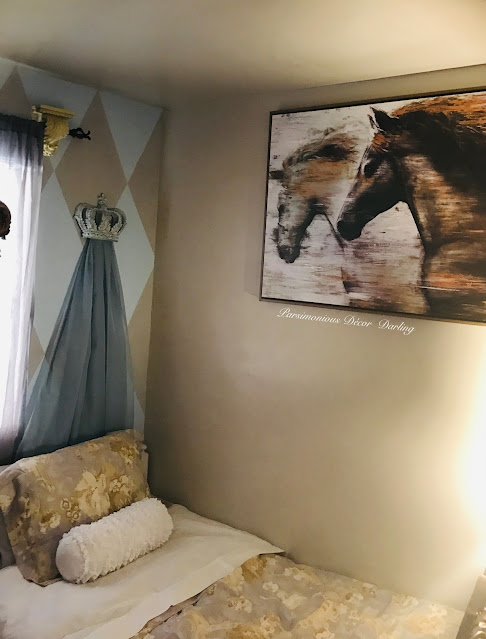
Here it is on the wall. Pas mal, no!?

On each girls' side of the room I added some coordinating art. On this side, two vintage finds from a local antique along with two sweet ballerina prints,

and on this side, a wonderful giclée of beautiful horses that I found at Kirkland's.
I also changed out the bedding. After looking around for some time, I settled on the Hathersage Collection from Ralph Lauren. It had the perfect combination of soft grey-blue with warm chocolate, cream, and grey accents. It was sophisticated without overt pretense or looking too grown-up or fussy, and I loved it!!
Here it is on the bed. It brought out the warm tones in the armoire, while also complimenting the wall colors and sheer grey draperies.

After some time, we also updated the girls' beds. They had been sleeping on the sweet little Ikea cottage beds inherited from their brothers I had painted white long ago.
We purchased two of these wonderful beds by from Pottery Barn's Emily & Meritt Collection. I just loved, loved this bed when I saw it. 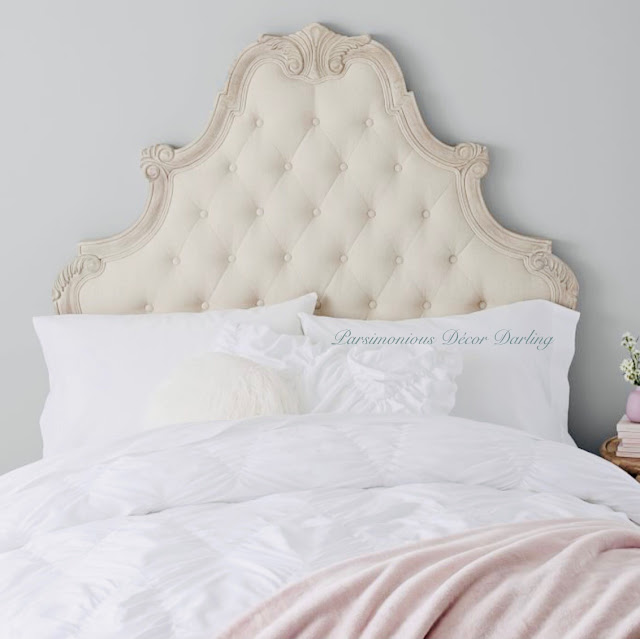


Such beautiful detail!
I will admit that because we had moved the room around, the beds were a bit too large in scale so I added a box to each crown, painted it in a soft grey,
and added a wooden initial for each girl.


Although the beds are a smidge too big, the girls both loved them so, so much as well, so I figured they could take them along as they moved into their own spaces, or that I could always use them in guest rooms later.
One day I may paint that beautiful Hoke Antique furniture to match the room more, here's the example I found via the internet:


I like the paint, although I'd likely go with a lighter blue. However, right now, I don't have the heart, lol! This whole set is listed for a whopping $5000 here on OfferUP!! Those are the same pieces I have, so it is a true testament to the amazing deal I found!
The Hoke Company only made a limited amount of these fine pieces per year, and they were made in the old way with no wood fillers, or veneers, other than the decorative finishes; unbelievable!! I think it's why I don't want to paint over it, I would hate to harm its integrity. What would you do??
You can learn more about the history of this fine American Company here and on YouTube here:
Thank you for visiting and journeying through this transition with me! If you would like to share the tutorial for the 99¢ Store Crown, you may pin it here:
Until next we meet,
--Y
If you enjoy this post, please visit the archives! You may also visit my full profile to view my other blogs. Connect with me on my Facebook Page, Parsimonious Décor Darling. You might like to visit my other blog hubs,
The Marvelous Maison, a lifestyle blog hub and
Frugal Fab Fashionista, my fashion blog hub.
Follow me on Pinterest!! Please be sure to kindly follow the board guidelines! Thank you!
Thank you for stopping by! ❤
What beautiful furniture you found for your daughters’ room. I might be afraid to paint it, but the pictures you showed sure are pretty. The crowns turned out so cute!
ReplyDeleteThank you so much, Kitty!! Yes, I’m definitely biting my nails over it, lol!
DeleteWhat a beautiful and elegant room you have decorated for your daughters. The crown is perfect and I like the added box and initial for the newer size bed, I like the look of "real wood" so I would not paint the beautiful furniture but you always do such a nice job with your painting finishes that if you do decide to paint it I'm sure it will be gorgeous!
DeleteThank you so much, Pat!! ❤️
DeleteWhat great DIY crowns, and all the furniture is gorgeous! Thanks for sharing at Vintage Charm. xo kathleen
ReplyDeleteThank you so much, and thank you for hosting!!
Delete