Showing posts with label Crafting. Show all posts

Friday, February 14, 2025

A Simple Valentine's Day


Hello, lovely ones in the bloggersphere and beyond!  I hope you are well.  This evening, I wanted to share a few simple tips that helped my Valentine's Day go off without a hitch.  I hope you enjoy the post!


For my Valentine's Day decorations this year, I kept the tree up that I used this past Christmas.  You may see this tree featured here in my post archives.


I removed the tree skirt, hot cocoa cups, and hot cocoa topper.  I found these cute foam hearts at The Dollar Tree.


I used a standard hole punch


to make holes in the tops of the foam hearts,


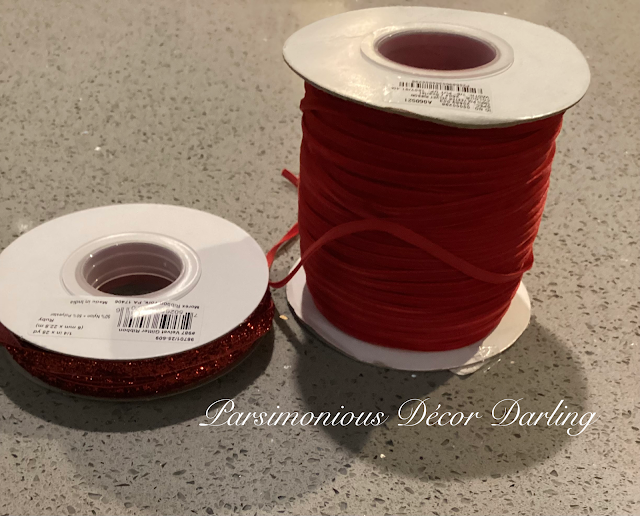
then I tied them with this pretty velvet ribbon Mr. Parsimonious found at Hobby Lobby.


I adorned the tree with the hearts in the places where the cocoa cups had been.  Super simple!


Setting the Table with Flair

The centerpiece for this simple setting consisted of fresh bougainvillea right from my garden and store-bought white roses.


I added one white rose to each of the place settings.


Each place setting included a beaded red charger, white hemstitched plate, ruby cup and saucer, and a demitasse fork and spoon.


A white cake stand was used for sweet pre-dinner noshes. 


You cannot go wrong with chocolates, strawberries and cheese (in this case, it was Babybel)!


A romantic setting for two.


Happy Valentine's Day!


Until next we meet,
--Y


From my collection:

Red chargers, Generic
White hemstitched plates, Ralph Lauren Whipstitch Collection
Ruby red cups and saucers, Anchor Hocking Royal Ruby Red Collection
Demitasse forks and spoons, Wallace Silversmiths Antique Baroque Collection
Cake stand, Ralph Lauren Pavillion Collection
Linen, Generic, from HomeGoods


If you enjoy this post, please visit the archives!  You may also visit my full profile to view my other blogs. Connect with me on my Facebook Page, Parsimonious Décor Darling.   You might like to visit my other blog hubs,

The Marvelous Maison, a lifestyle blog hub and 
Frugal Fab Fashionista, my fashion blog hub. 

Follow me on Pinterest!!  Please be sure to kindly follow the board guidelines!  Thank you!  

Thank you for stopping by! ❤


Friday, November 20, 2020

Ageing Galvanized Metal


Hello, Blogland Buddies and beyond!  I hope everyone is enjoying the beauty that Autumn has to offer, even in the state of the world today with a horrific pandemic looming. 

I attempt to keep some sense of normalcy these days as much as possible.  It is a comfort in these trying times.  I have decorated for the fall, and it will remain that way until next week because we will still have our immediate family (seven of us total!) over this coming Thanksgiving.  I think especially this year, it is important to count those small blessings, and all of  my children save for one are still minors living at home.  Our eldest has been home quarantined, so we feel safe to be together this coming holiday.  

Today, I am sharing a quick tutorial about how to age galvanized metal.  It is perfect for decorating fall crafts.  I hope you enjoy the post!


There is something so charming to me about things that are old and tell a history.  It is likely why I love collecting antiques.  Sometimes, though, homemade "oldness" can be just as lovely.  This tutorial is one I found by perusing YouTube.  Of all the tutorials I found, this one via Mr. DIY Dork seemed to be the most comprehensive.  The video also includes three ways to age your galvanized metal.  The method I chose is using Lysol toilet cleaner.


To age your galvanized metal you will need:

Steel wool (I used S.O.S. pads)
Lysol toilet bowl cleaner
Gloves to protect your hands


A galvanized bucket. I found this extra-large one at Lowe’s.


First, I began by removing the sticker and any remaining residue.  I used the toilet cleaner, but I’m sure Goof-Off or Goo-Gone would work as well.  Generously wet down the metal with the toilet bowl cleaner.


Add additional toilet bowl cleaner and work the solution into the metal using the S.O.S. pad.  Allow to sit for a half hour or so to allow the chemical reaction to take place.  Rinse off.  Here is a shot of an untreated bucket next to the treated one.  Easy Peasy!!


This weathered metal look can be used for all types of DIY and crafting projects, and I ADORE that it sooo easy!


Perfect for a rustic little vignette for the coming Thanksgiving celebration.


Thank you so much for popping into my little corner, and I hope you and your friends, family, and loved ones are safe!  Until next time,


--Y


If you enjoy this post, please visit the archives!  You may also visit my full profile to view my other blogs. Connect with me on my Facebook Page, Parsimonious Décor Darling.   You might like to visit my other blog hubs,

The Marvelous Maison, a lifestyle blog hub and 
Frugal Fab Fashionista, my fashion blog hub. 

Follow me on Pinterest!!  Please be sure to kindly follow the board guidelines!  Thank you!  

Thank you for stopping by! ❤


.